Introduction
This howto shows you how to restrict/limit user access onto monitoring objects in Icinga Web 2.
This depends on common configuration best practices in Icinga 2 with groups and custom attributes.
This is a community howto enhanced by many. If you have additions, edit the topic or start a discussion below.
Author: @mfriedrich
Revision: 0.1
Tested with:
- Icinga Web 2 v2.5.x
- Icinga 2 v2.8.x
Requirements
- Icinga 2 is configured and running
- Icinga Web 2 using the default admin account is running and presents all monitoring data
- Basics from the documentation (Icinga 2, Icinga Web 2): https://www.icinga.com/docs/
Configuration
Patterns and Groups in Icinga 2
Start simple with just one HostGroup, e.g. by using the one found in conf.d.
https://www.icinga.com/docs/icinga2/latest/doc/03-monitoring-basics/#groups
Example, please adjust for your own needs.
object HostGroup "linux-servers" {
  assign where host.vars.os == "Linux"
}
object HostGroup "windows-servers" {
  assign where host.vars.os == "Windows"
}
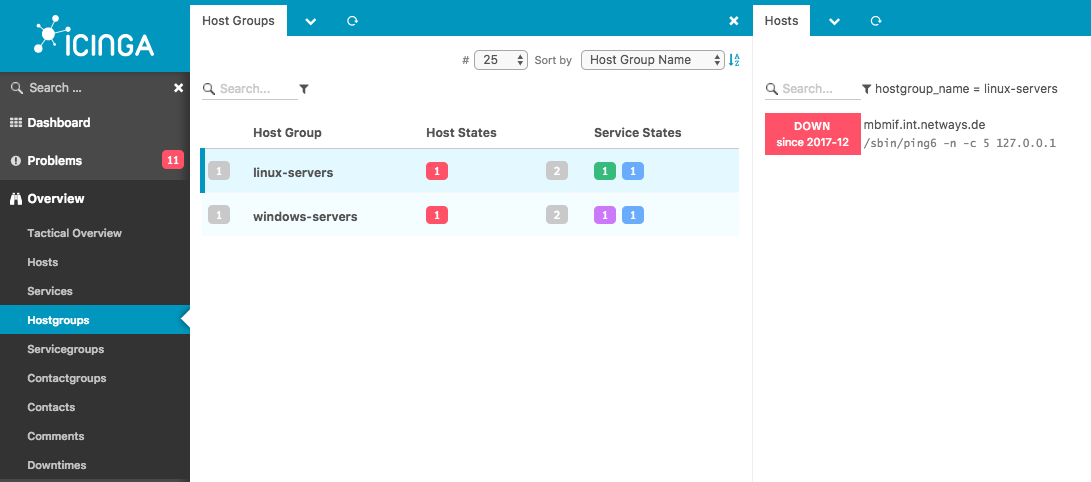
Check that the Icinga Web 2 Hostgroups overview lists it and it has some hosts inside it. Ensure that there are other hosts which are not part of this group.
Create an Icinga Web 2 User
Now create a new Icinga Web 2 user underneath Configuration > Authentication > Users.
https://www.icinga.com/docs/icingaweb2/latest/doc/06-Security/

Groups
You can optionally create a new user group and add users as members. This can be later used for easier role management.
Imported AD Users
If you are managing your users externally, e.g. imported from LDAP, choose the corresponding groups as best practice.
Permissions and Restrictions
In terms of permissions and restrictions, read on in the monitoring module’s docs to gain more insights: Security - Icinga Web
Roles
Next, create a new role for the linux-team for example. Assign them read only access for the monitoring module, allow to ack, comment, add downtimes but not delete them.
The main restriction must be defined for monitoring/filter/objects. In this example, the user should only see the hosts and services inside the linux-servers group.
hostgroup_name=linux-servers
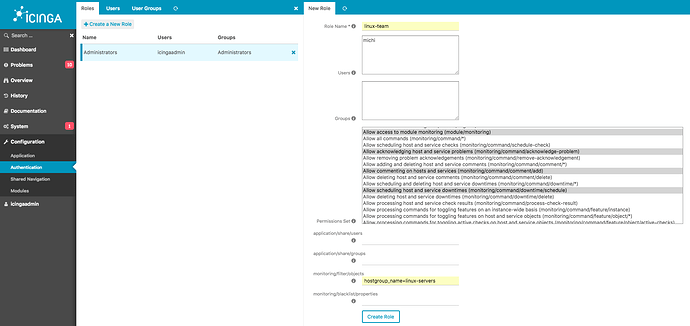
Create the role.
Test Restricted User
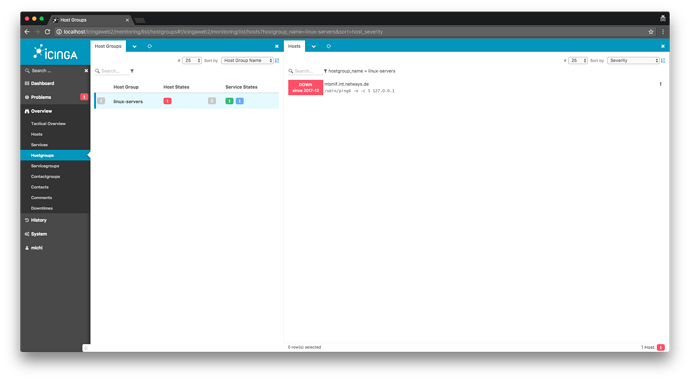
Now open a different browser or an incognito tab, and log into Icinga Web 2 with the restricted user. Navigate on the dashboard and pick the hostgroups. You can only see the hosts assigned to this specific host group ![]()
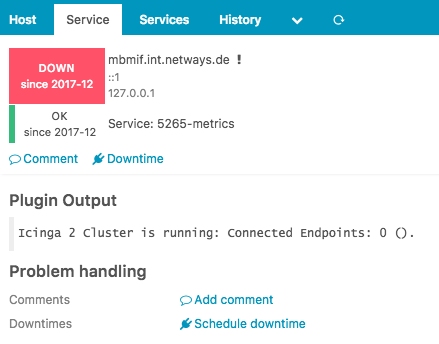
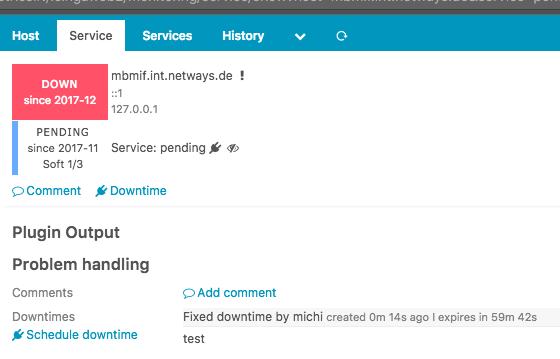
Navigate into the host and service detail. You can see that the user is not allowed to reschedule a check (as this could hammer the remote client, or influence SLA reporting).
Different example: Schedule a downtime with the restricted user and try to delete it. The X icon is not available.
Conclusion
Specific restrictions and limited views are mandatory in modern monitoring environments. Commonly used best practices use name patterns, host groups and custom attributes for filtering objects for specific user groups.
Such restrictions and roles are also required by public dashboards where the user only needs read-only access to view the monitored objects and their state.
Application specific things, logs, etc. or for example configuration management with the Director should only be possible for the actual admins, and not publicly available to anyone.
The more complex your filters are, the more work needs to be done by the database backend. Keep that in mind when building these restrictions into your large scale environment.
FAQ
More Restrictions
Generally speaking you can use all the list view filters you’ve created in the filter editor. Common best practice is to use custom attributes too, e.g. where vars.os is set on the Host object in Icinga 2.
Modules
Icinga Web 2 modules can provide their own restrictions. Once installed and enabled, these permissions are available in the roles configuration form.
Automation
Icinga Web 2 stores the configuration in /etc/icingaweb2 by default. Generate it just once from the web configuration wizards and automate your deployment based on these example (or the ones provided in the documentation).