Install Guide AlmaLinux 10.2 Server Icinga2 + IcingaDB + IcingaDB-Web + Director
A Guide for installing the Subscription Version of Icinga2.
Basics
I skip the part with accessing the machine.
First thing most people would do is updating the os.
root@alma102-test ~]# dnf update -y && dnf upgrade -y
Second in a AlmaLinux System WGET is not installed so we do it
dnf install wget -y
Then adding the repos for installing icinga2 and components.
Here is the biggest change
You must have a VALID Subscription for the Icinga Package repository you can’t interchange the rpm packages from a fedora installation or OpenSuse.
You can apply for an Developer Subscription
Or see the other Options
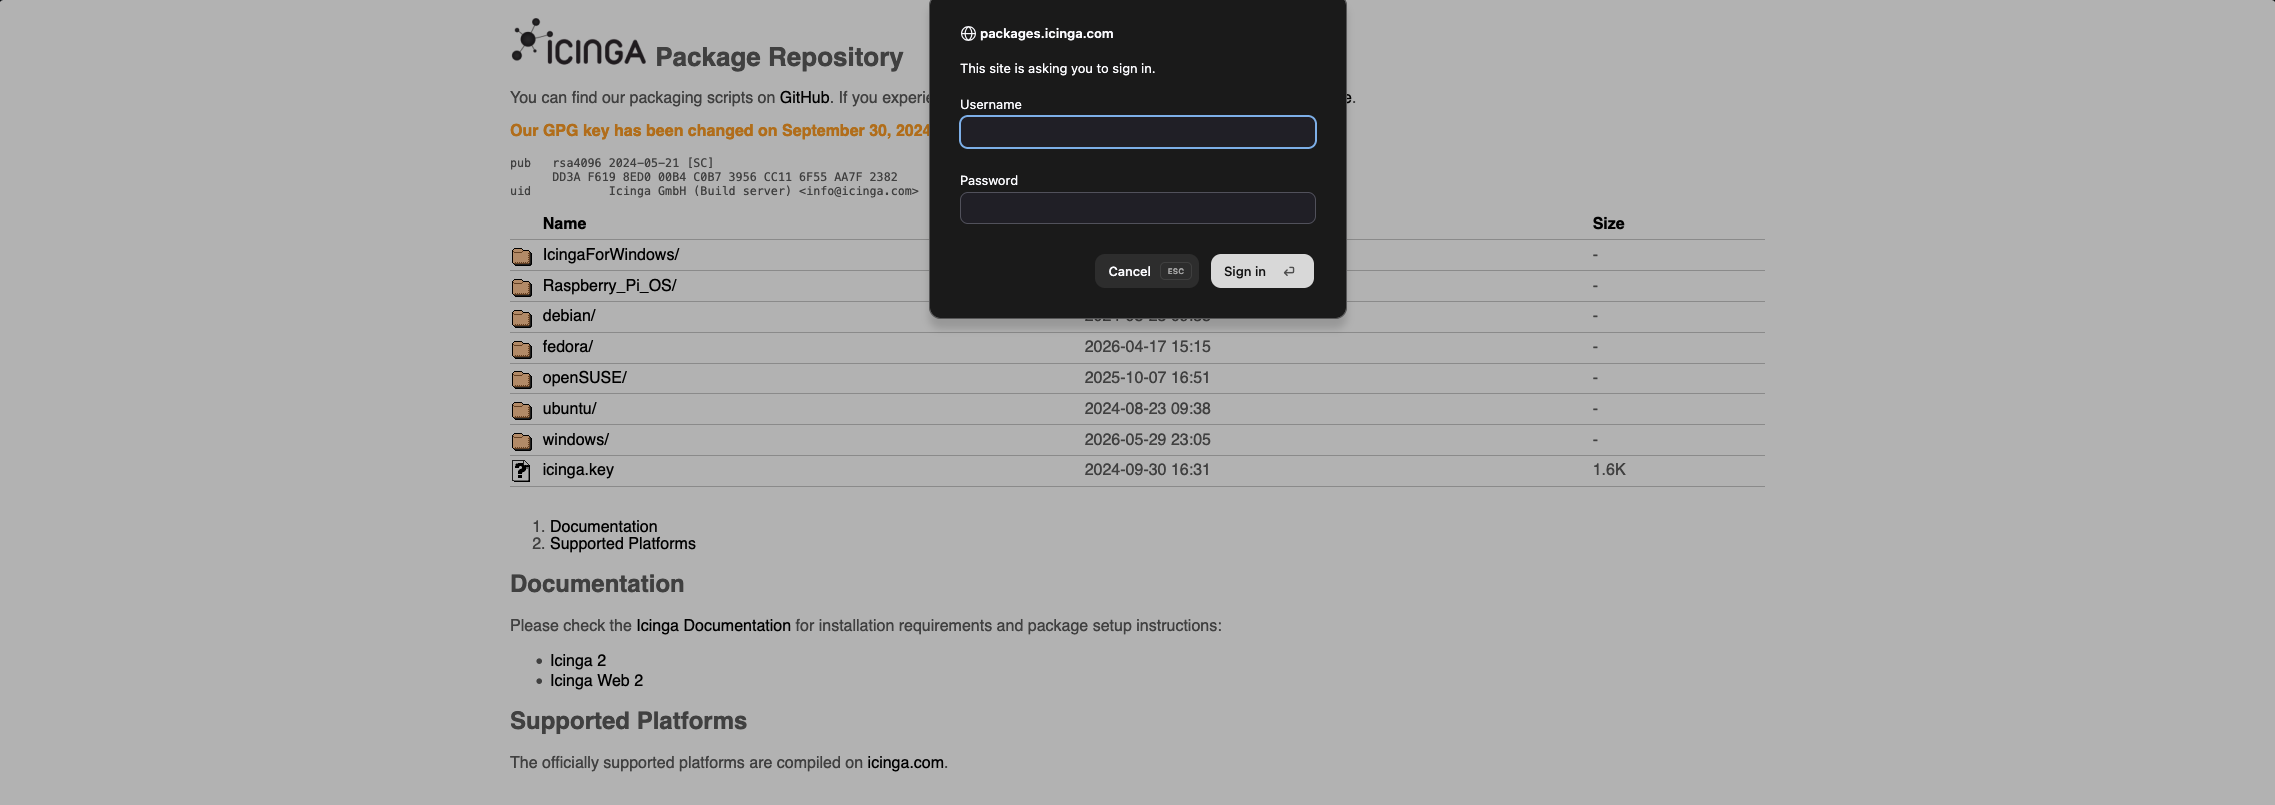
In either way you need access to https://packages.icinga.com/subscription with valid credentials.
You will be greeted with the following screen.
After the login we go to the rhel repo.

Then we download the repofile for stable into the yum.repos.d folder
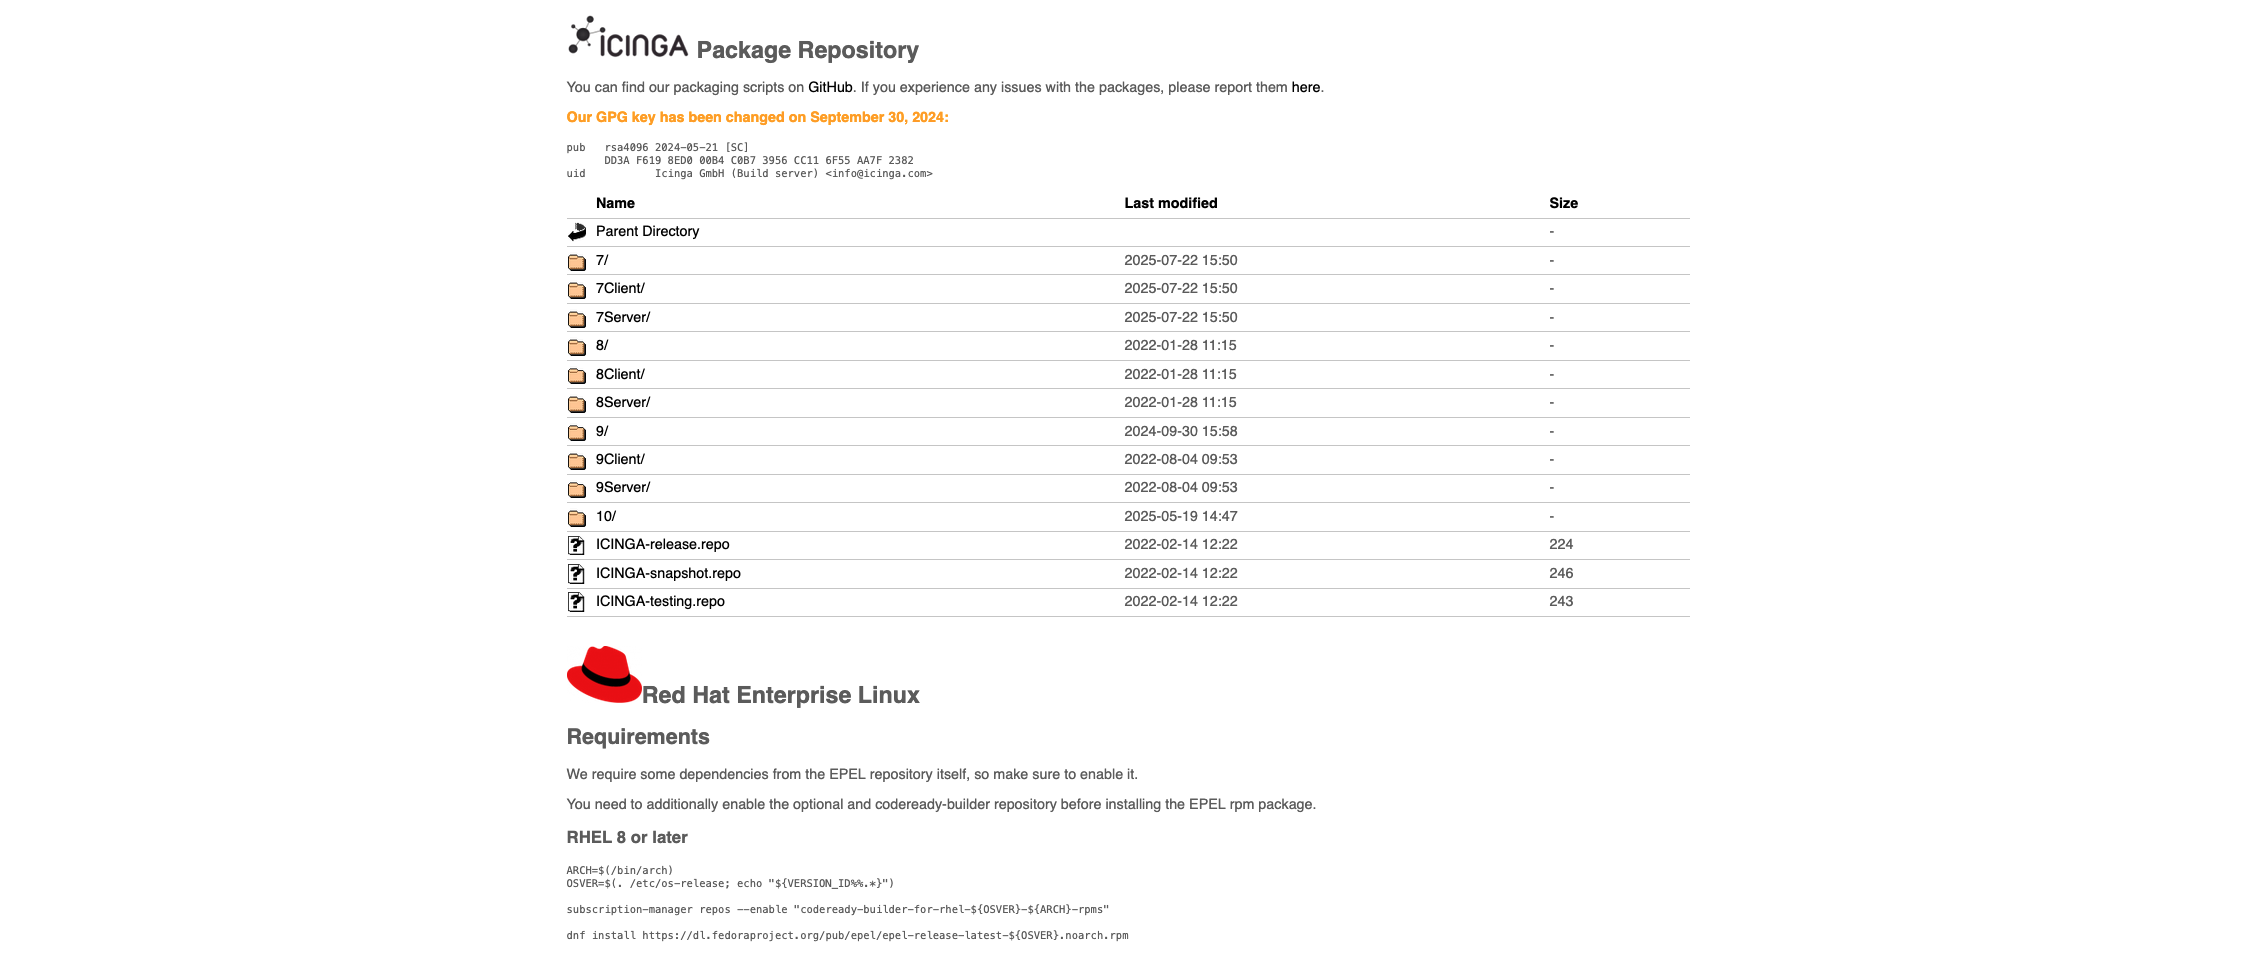
wget https://packages.icinga.com/subscription/rhel/ICINGA-release.repo -O /etc/yum.repos.d/ICINGA-release.repo
Next we would need to edit that file use the editor of you choice (vim/nano/whatever).
vim /etc/yum.repos.d/ICINGA-release.repo
You will need to insert the access credentials into the repofile.
We need to fill in the following parts.
username=examplename
password=examplepassword
We save the file and exit.
Then we run an dnf update -y to sync the repos again.
dnf update -y
The Output should look like this:
[root@alma102-test yum.repos.d]# dnf update -y
ICINGA (stable release for rhel)                                        1.0 MB/s |  58 kB     00:00
Dependencies resolved.
Also we would need to enable codereadybuilder and peel
dnf config-manager --set-enabled crb
dnf install epel-release -y
Finished with another update of the system
dnf update -y
You should see that the packages are synced
[root@alma102-test ~]# dnf update -y
Last metadata expiration check: 0:08:20 ago on Fri 05 Jun 2026 11:30:58 AM UTC.
Dependencies resolved.
Nothing to do.
Complete!
Databases
Before installing the icinga2 core system I would start in installing the database system and the plain databases without any content.
As a simplified start I use mariadb-server.
dnf install mariadb-server -y
As on any RHEL based system the service is NOT started automatically.
A simple Systemctl command should show status inactive
systemctl status mysql
Also we would need to enable and start the service
systemctl enable mysql.service --now
After that a further check should show that it is active.
systemctl status mysql
Let’s create the Databases we would use later on.
mysql -e "create database icingadb character set 'utf8'; grant all on icingadb.* to 'icingadb'@localhost identified by 'icingadb';"

mysql -e "create database director character set 'utf8'; grant all on director.* to 'director'@localhost identified by 'director';"

mysql -e "create database web2 character set 'utf8'; grant all on web2.* to 'web2'@localhost identified by 'web2';"
As any responsible person would do please use in “Real” Production environments secure Passwords.
Something like the following should help
openssl rand -base64 24
So this leaves us with the following:
[root@alma102-test ~]# mysql
Welcome to the MariaDB monitor.  Commands end with ; or \g.
Your MariaDB connection id is 6
Server version: 10.11.15-MariaDB MariaDB Server

Copyright (c) 2000, 2018, Oracle, MariaDB Corporation Ab and others.

Type 'help;' or '\h' for help. Type '\c' to clear the current input statement.

MariaDB [(none)]> show databases;
+--------------------+
| Database           |
+--------------------+
| director           |
| icingadb           |
| information_schema |
| mysql              |
| performance_schema |
| sys                |
| web2               |
+--------------------+
7 rows in set (0.001 sec)
So we have now rudimentary setup the databases.
Lets install icinga2 + icingadb + director
We install the components
dnf install icinga2 icingadb icingadb-web icingadb-redis icinga-director -y
After the install we take a look if the icinga2 core system is running.
systemctl status icinga2
It should list the service inactive. So we need to enable it as well.
systemctl enable icinga2.service --now
Now we perform the finalizing steps for the Databases before we move on to the web server part.
Let’s start with the Director Schema.
Icinga Director Schema
We install the initial Schema into the Director Database.
mysql director < /usr/share/icingaweb2/modules/director/schema/mysql.sql
To See if the Schema was applied correctly we use the following command
mysql -e "use director; select * from director_schema_migration;"
It should output something like this:
[root@alma102-test ~]# mysql -e "use director; select * from director_schema_migration;"
+----------------+---------------------+
| schema_version | migration_time      |
+----------------+---------------------+
|            191 | 2026-06-05 11:53:42 |
+----------------+---------------------+
Now let’s move on to the icingadb Schema.
IcingaDB Schema
We install the initial Schema into the icingadb Database.
mysql icingadb < /usr/share/icingadb/schema/mysql/schema.sql
To See if the Schema was applied correctly we use the following command.
mysql -e "use icingadb; select * from icingadb_schema;"
It should output something like this
[root@alma102-test ~]# mysql -e "use icingadb; select * from icingadb_schema;"
+----+---------+---------------+
| id | version | timestamp     |
+----+---------+---------------+
|  1 |       7 | 1780660552000 |
+----+---------+---------------+
Now to the final Database the icingadb-Web.
IcingaDB-Web Schema
We install the initial Schema into the web2 Database.
mysql web2 < /usr/share/icingaweb2/schema/mysql.schema.sql
To See if the Schema was applied correctly we use the following command.
mysql -e "use web2; select * from icingaweb_schema;"
It should output something like this
[root@alma102-test ~]# mysql -e "use web2; select * from icingaweb_schema;"
+----+---------+---------------+---------+--------+
| id | version | timestamp     | success | reason |
+----+---------+---------------+---------+--------+
|  1 | 2.12.0  | 1780660737000 | y       | NULL   |
+----+---------+---------------+---------+--------+
Now we have all the Databases initialised.
We progress now to further Settings and then the Web interface.
Further Configurations
As we have installed icingadb there is a settings file that requires our attention.
It can be found under
/etc/icingadb/config.yml
Inside there is a paragraph for the already created database.
[root@alma102-test icingadb]# cat config.yml
# This is the configuration file for Icinga DB.

# Connection configuration for the database to which Icinga DB synchronizes monitoring data.
# This is also the database used in Icinga DB Web to view and work with the data.
# In high availability setups, all Icinga DB instances must write to the same database.
database:
  # Database type. Either 'mysql' for MySQL or 'pgsql' for PostgreSQL.
  # Defaults to 'mysql'.
#  type: mysql

  # Database host or absolute Unix socket path.
  host: localhost

  # Database port. By default, the MySQL or PostgreSQL port, depending on the database type.
#  port:

  # Database name.
  database: icingadb

  # Database user.
  user: icingadb

  # Database password.
  password: CHANGEME
...
As we can see we should change the entry for the password as it is still in the default setting.
So we replace the CHANGEME with icingadb as set before during the database setup.
We use the following text replace command
cd /etc/icingadb/
sed -i 's/CHANGEME/icingadb/' config.yml
After that we initialise and start the service so it registers the changed password
systemctl enable icingadb.service --now
We now move on to the Apache2/httpd configuration.
Apache2 Setup
I think as a best practice we do the same override as on the Debian side.
We would need to set an systemd override to access correctly the icingaweb2 folder to avoid problems with the setup therefore we use for the uninitiated the systemd edit mode.
systemctl edit httpd.service
The following will look like this and you will need to enter the following like in the screenshot.
This will create an override file which extends the unit file settings.
And ^X as a Key Command means CTRL+X or STRG+X.
This will need Both a confirmation via the Enter key.
[Service]
ReadWritePaths=/etc/icingaweb2 /var/lib/icingaweb2
RestrictSUIDSGID=no
Also it would need a systemctl daemon-reload to load the change and a restart of the service itself.
systemctl daemon-reload
systemctl enable httpd.service --now
And just in case you had a typo or don’t want the file and setting anymore it can be removed with
rm /etc/systemd/system/httpd.service.d/override.conf
systemctl daemon-reload
systemctl restart httpd.service
And also a restart of the service.
Also on a RHEL based system we need to adjust selinux.
We change SELINUX=enforcing into SELINUX=permissive
vim /etc/selinux/config

SELINUX=permissive
Alternative you can set the selinux enforcing in the session with
setenforce 0
Icinga2 features
We also need to enable 2 Features before we enter the GUI Phase.
First)
We enable the certificates and api setup with enabling the node wizard
icinga2 node wizard
Will ask us to setup a master or satellite node .. we proceed with a master node (n).
And Simply press enter until it is over.
Herewith we created certificates (self-signed) for the master node and also activated the api feature.
We edit then the following file therefore we install vim first
dnf install vim -y
vim /etc/icinga2/conf.d/api-users.conf
And add the following lines:
object ApiUser "icingadb" {
  password = "icingadb"
  // client_cn = ""

  permissions = [ "*" ]
}
Then we restart the service
systemctl restart icinga2
Second)
We will need to enable the icingadb feature
This will simply be done with
icinga2 feature enable icingadb
And we might need to uncomment the following two lines.
Inside the following file /etc/icinga2/features-enabled/icingadb.conf
object IcingaDB "icingadb" {
  host = "127.0.0.1"
  port = 6380
  //password = "xxx"
}
This will point to the running redis service for the icingadb feature.
We restart the icinga2 service.
systemctl restart icinga2
Icingaweb2/IcingaDB-Web2 Setup
Now we finally enter the Web Stage.
Lets begin with creating a setup token on the command line
icingacli setup token create
It should provide an output like this:
[root@alma102-test icingadb]# icingacli setup token create
The newly generated setup token is: 1584cf177aff3c9a
And then we go to our web server address in my case
http://x.x.x.x/icingaweb2/setup
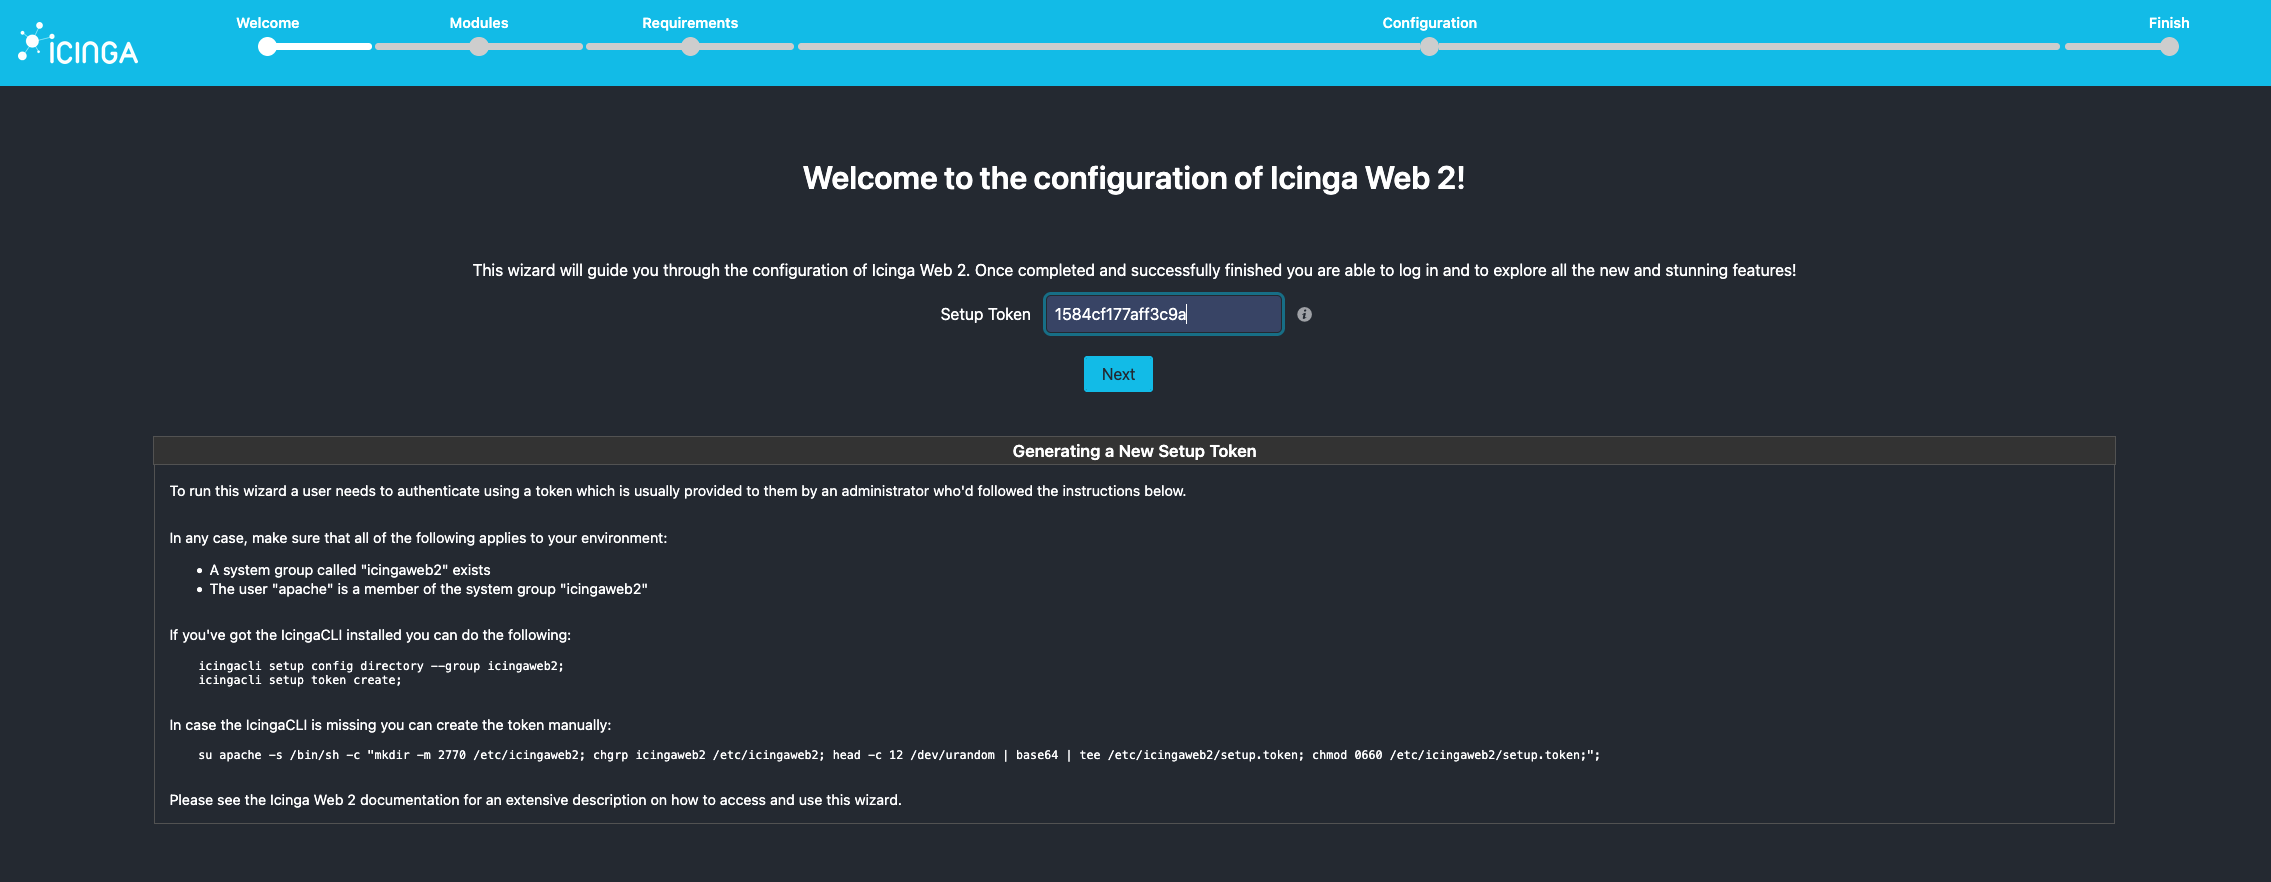
however the ip address can change and don’t be afraid there is no initial tls/ssl certificate
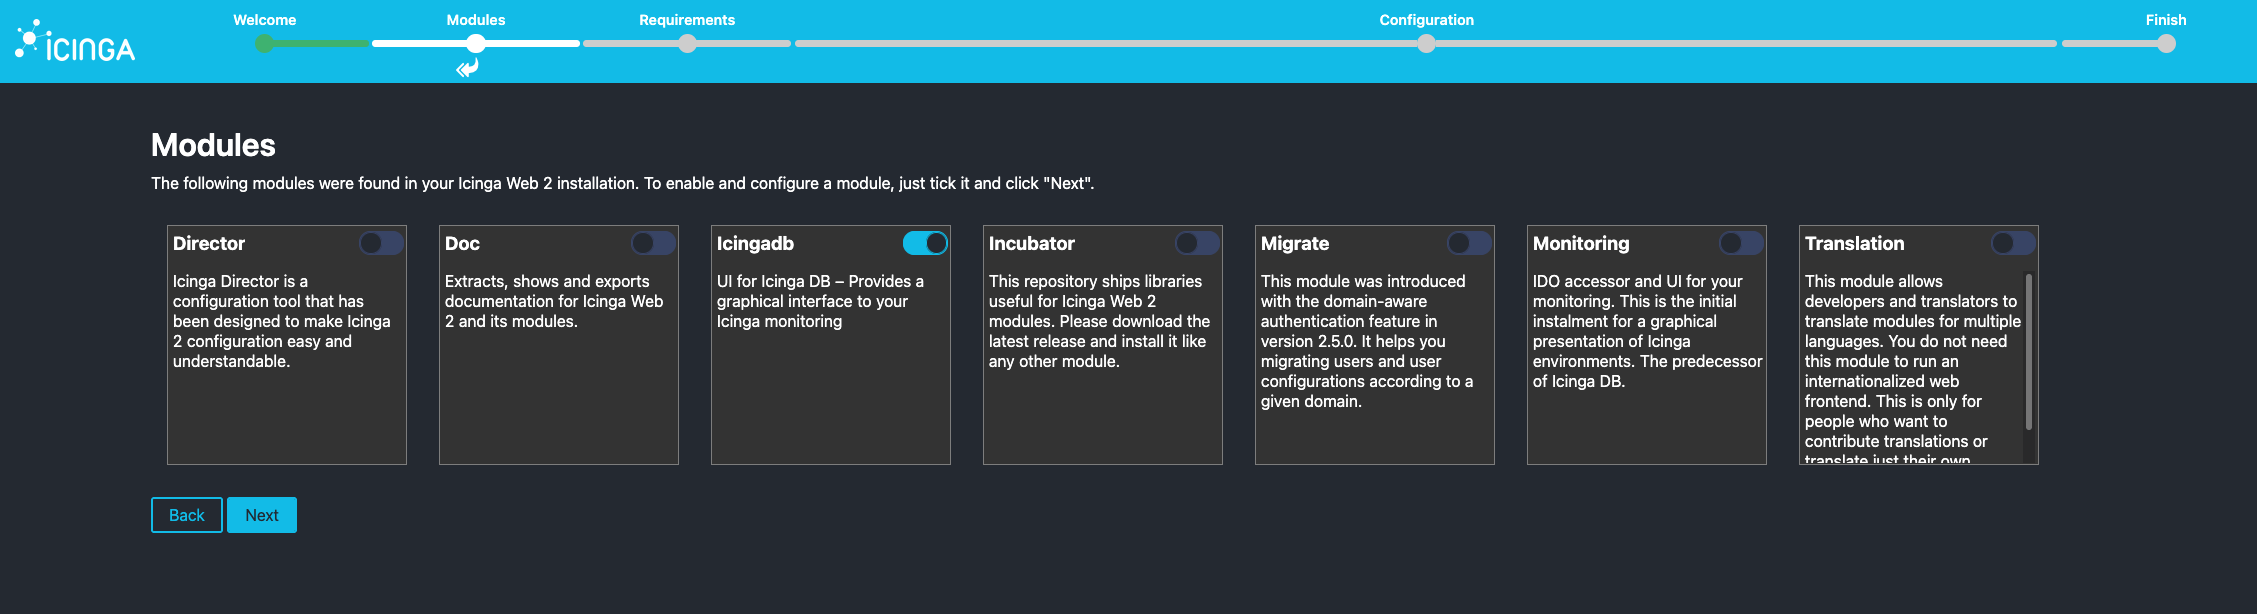
After entering the token we click next and will be furthermore greeted with a choice of the modules we can use .. we simply proceed and click next.
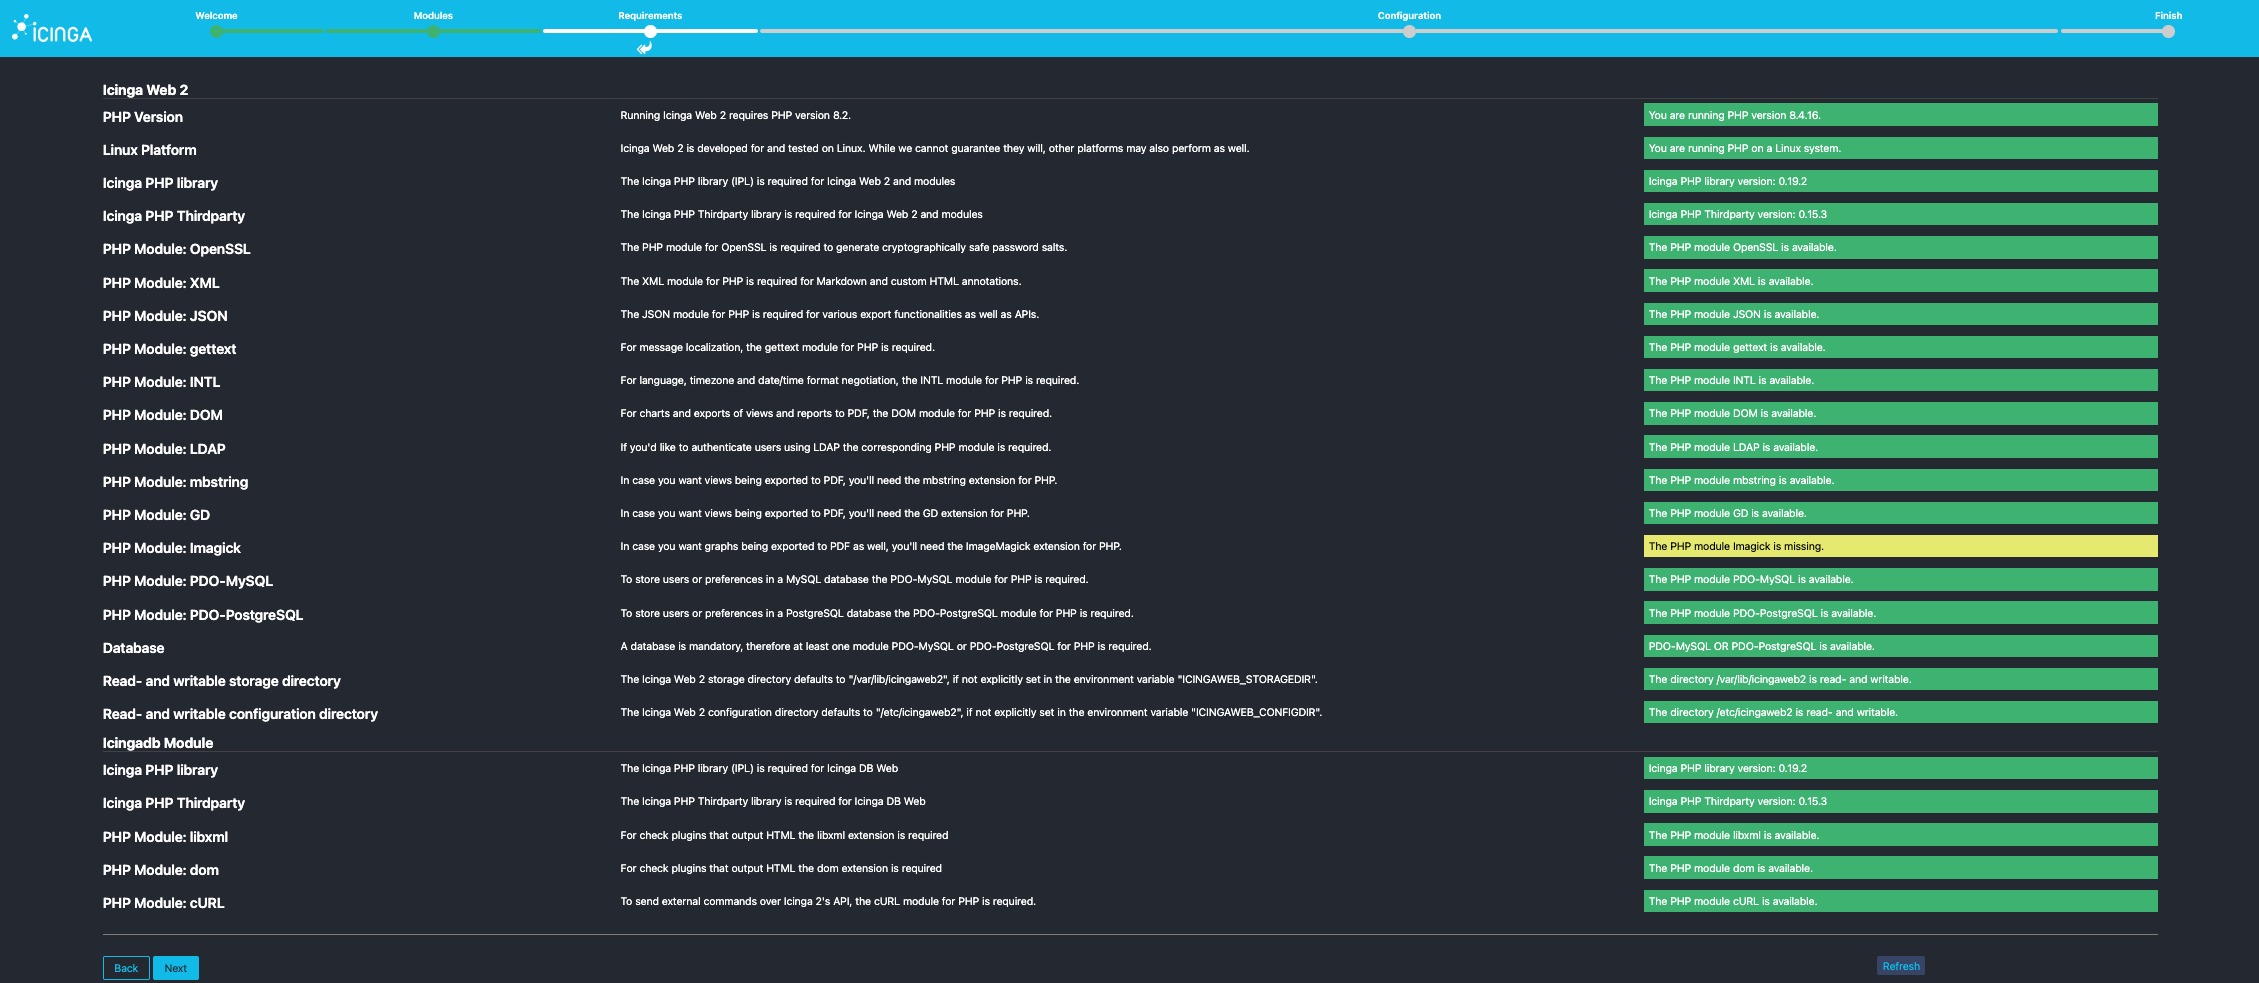
As we see the Imagick php extension is missing .. as this is a warning and it is only needed for an export of graphs we skip it and move on clicking next.

It will ask us now for the initial user database in this case we use the Web2 database we defined earlier.
First choice here is database then => next.
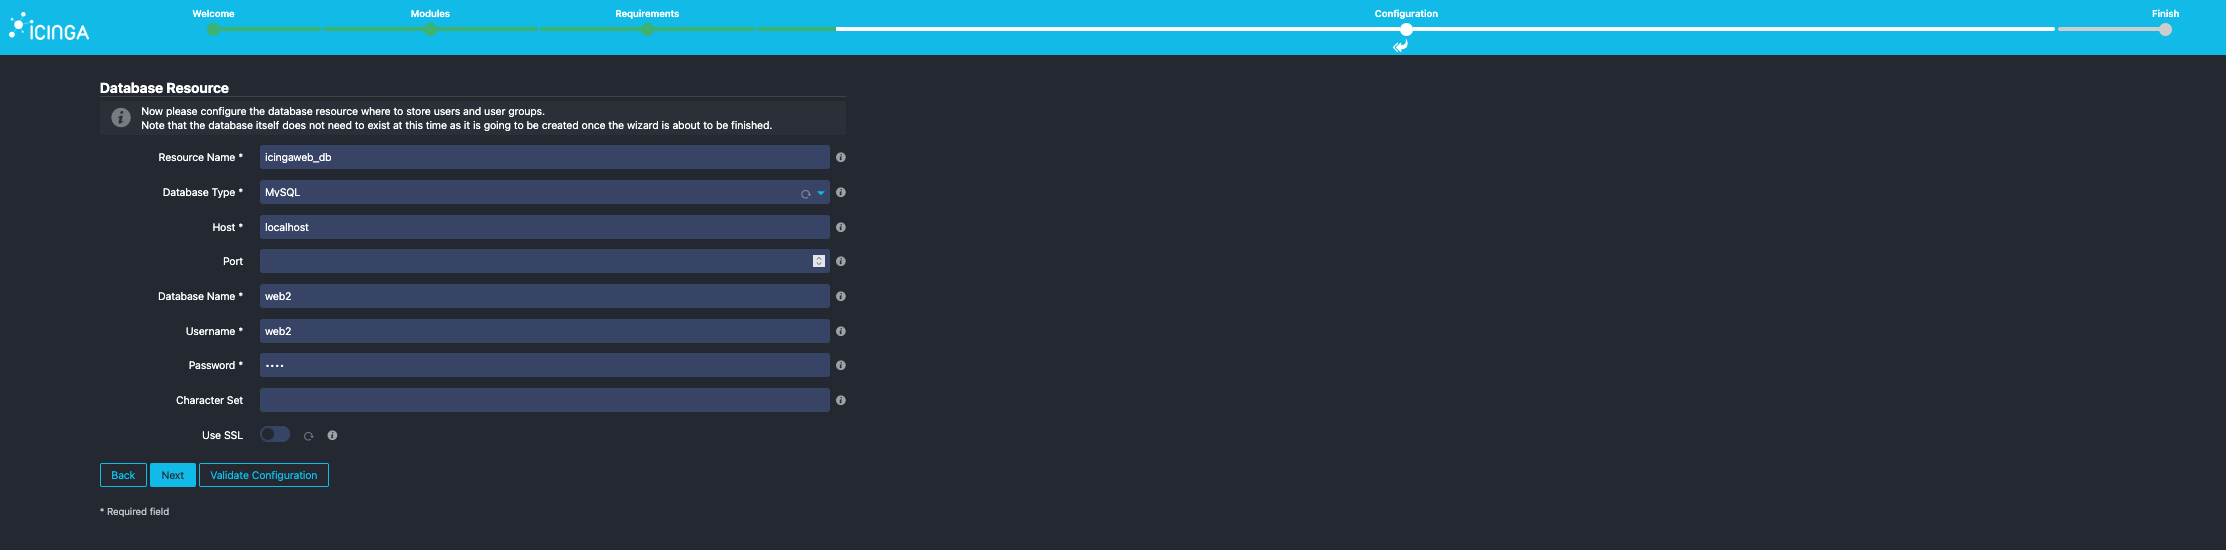
Database Name => web2
Username => web2
Password => web2
We fill out the required fields and then click validate.
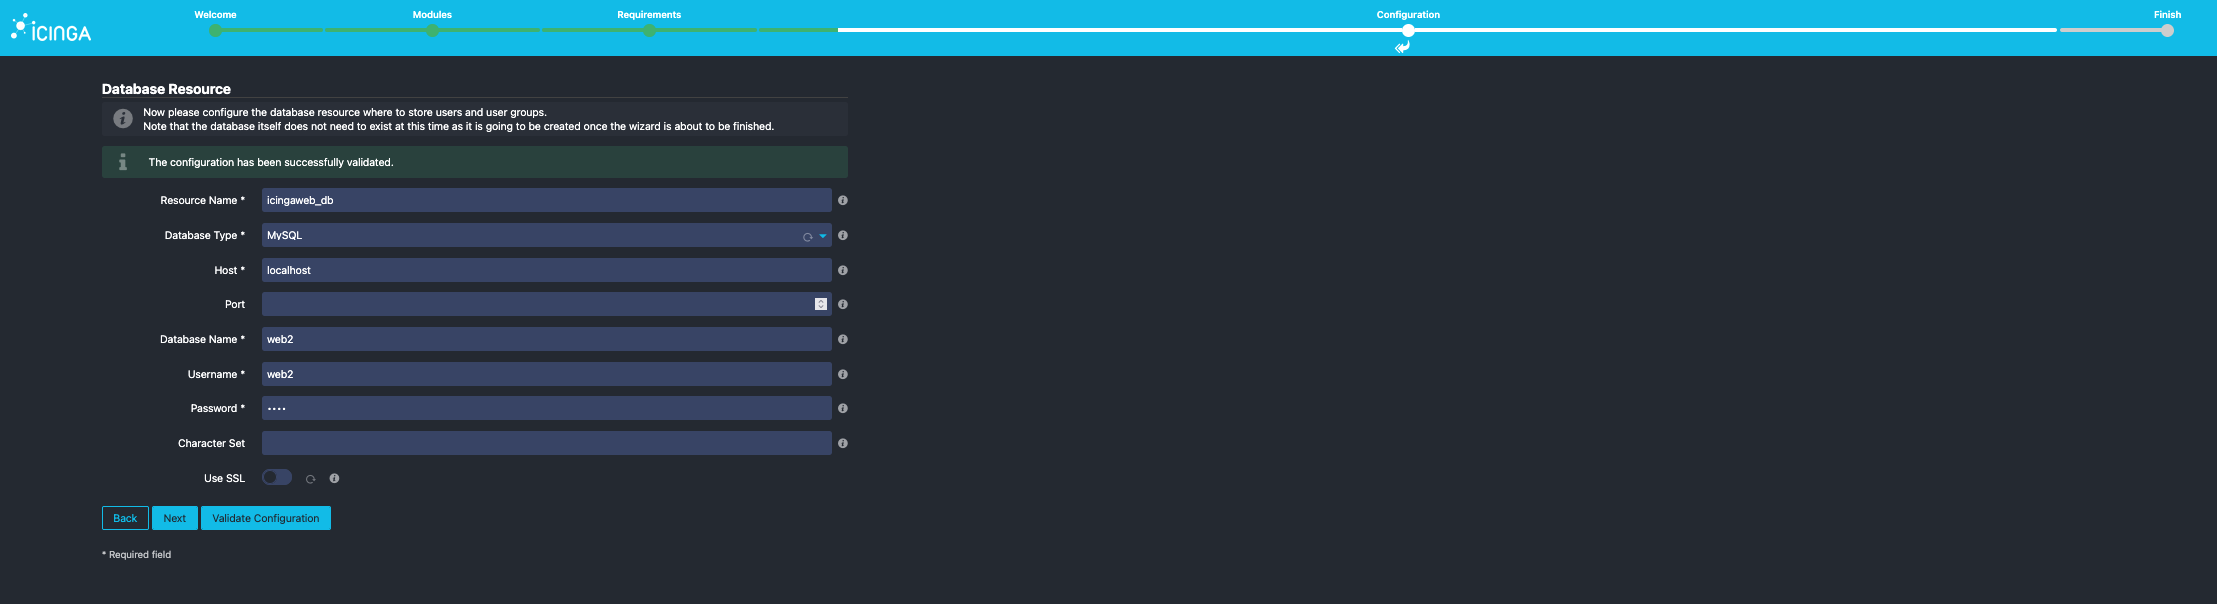
Then proceed with => next.

Now we can name the settings from before our user Backend is named icingaweb2.
We leave it at the default and move on clicking => next.

Next is the initial Administrative user we setup in the database.
I suggest naming him admin and give him a supersecret password.
Username => admin
Password => supersecret
Repeat Password => supersecret
Now comes a further settings page which we leave at the default at this moment.
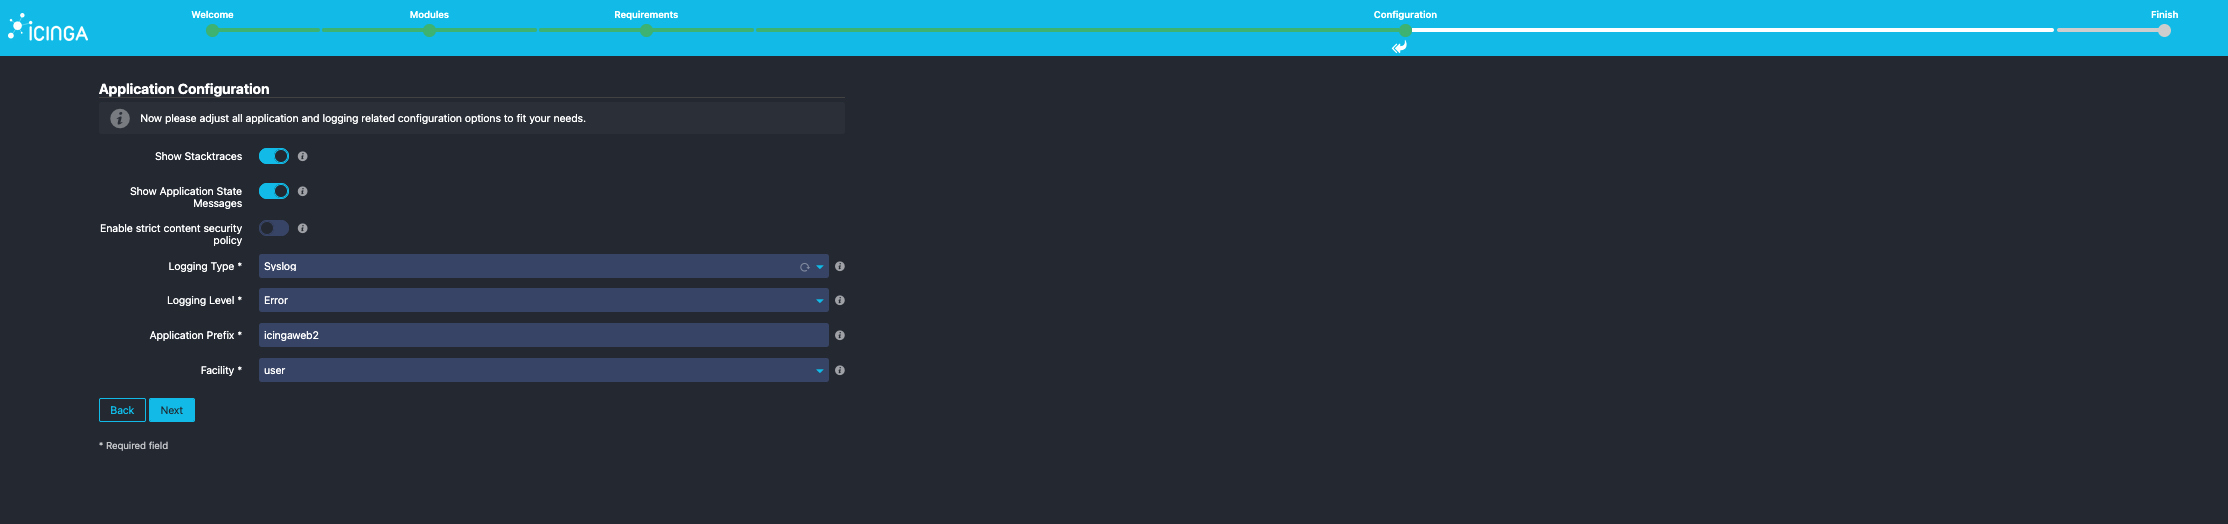
Click => next
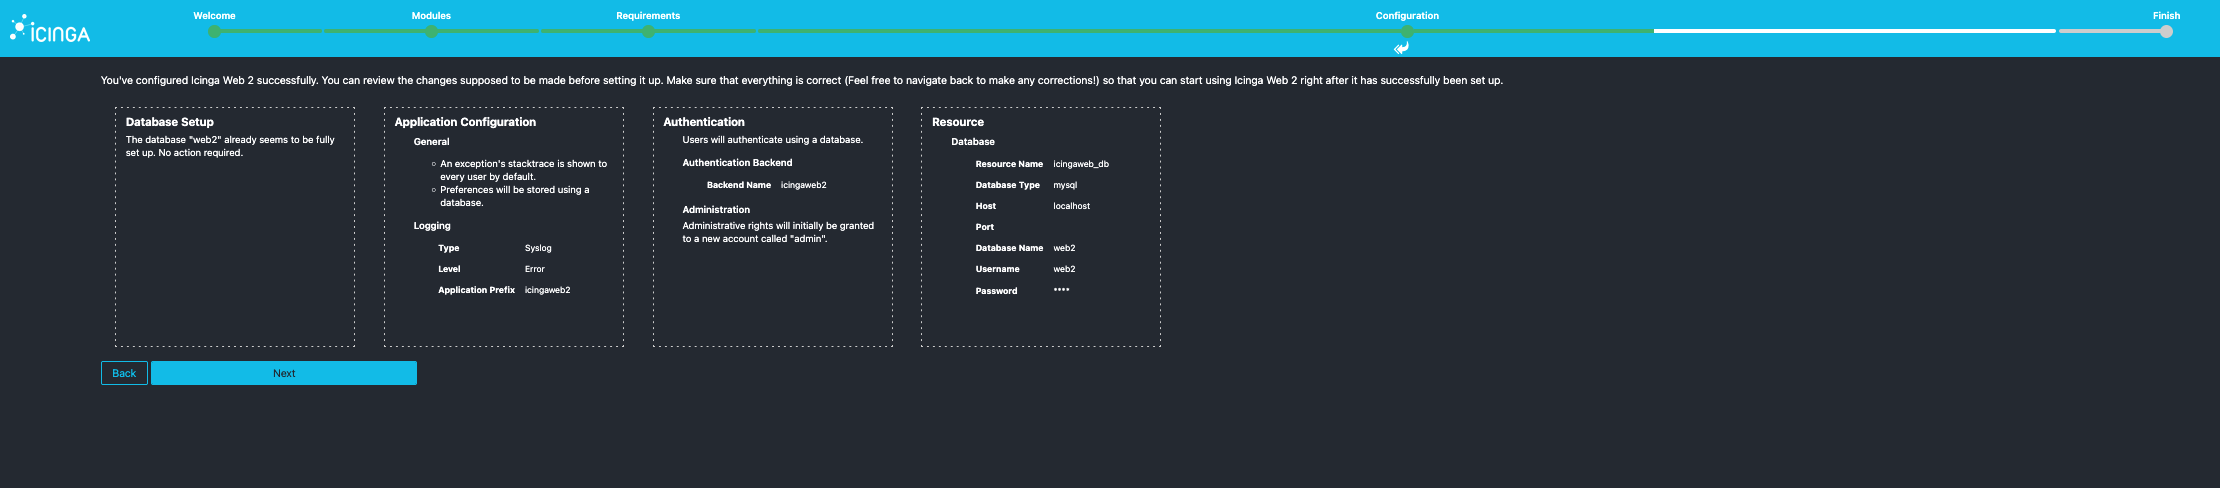
Then comes a summary page which we also skip with next.
Now we Enter the IcingaDB-Web configuration.
IcingaDB-Web Config
First we will be asked for the settings of the Database we created beforehand.
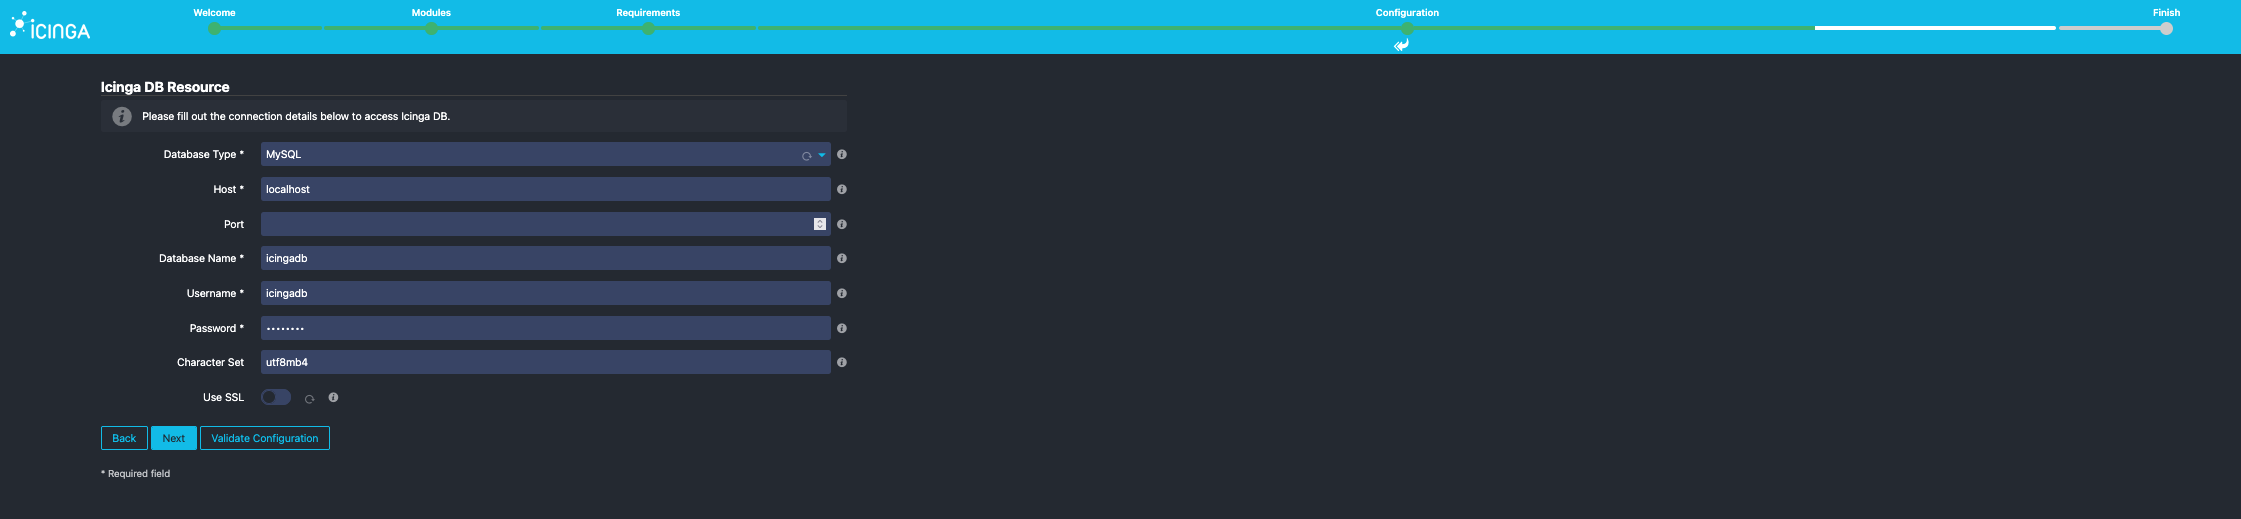
Database Name => icingadb
Username => icingadb
Password => icingadb
We might need to change the host address depending on the ip which might be necessary.
Also keep in mind that depending on your infrastructure you might need to adjust also the grants on the Database users in my example i used icingadb@localhost it might be something other in your infrastructure e.g. icingadb@192.168.172.1 as an Example.
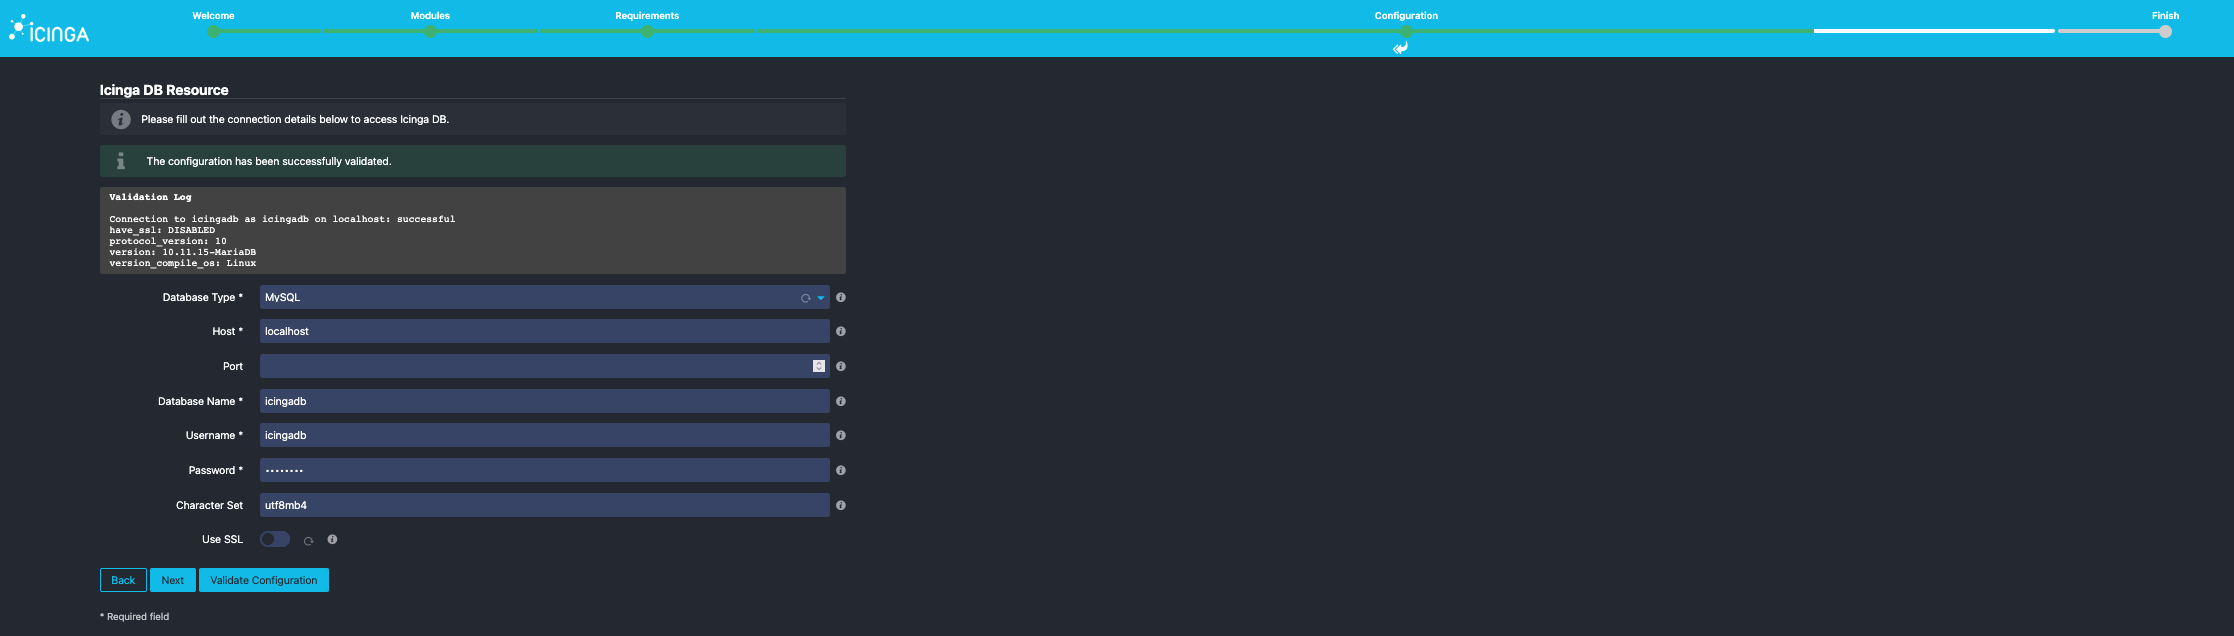
We finish with a validate and then proceed with next
IcingaDB-Redis
As a RHEL based system redis wasn’t initiated until now so we enable it.
systemctl enable icingadb-redis.service --now
We now will be greeted with the icingadb-redis setup page.
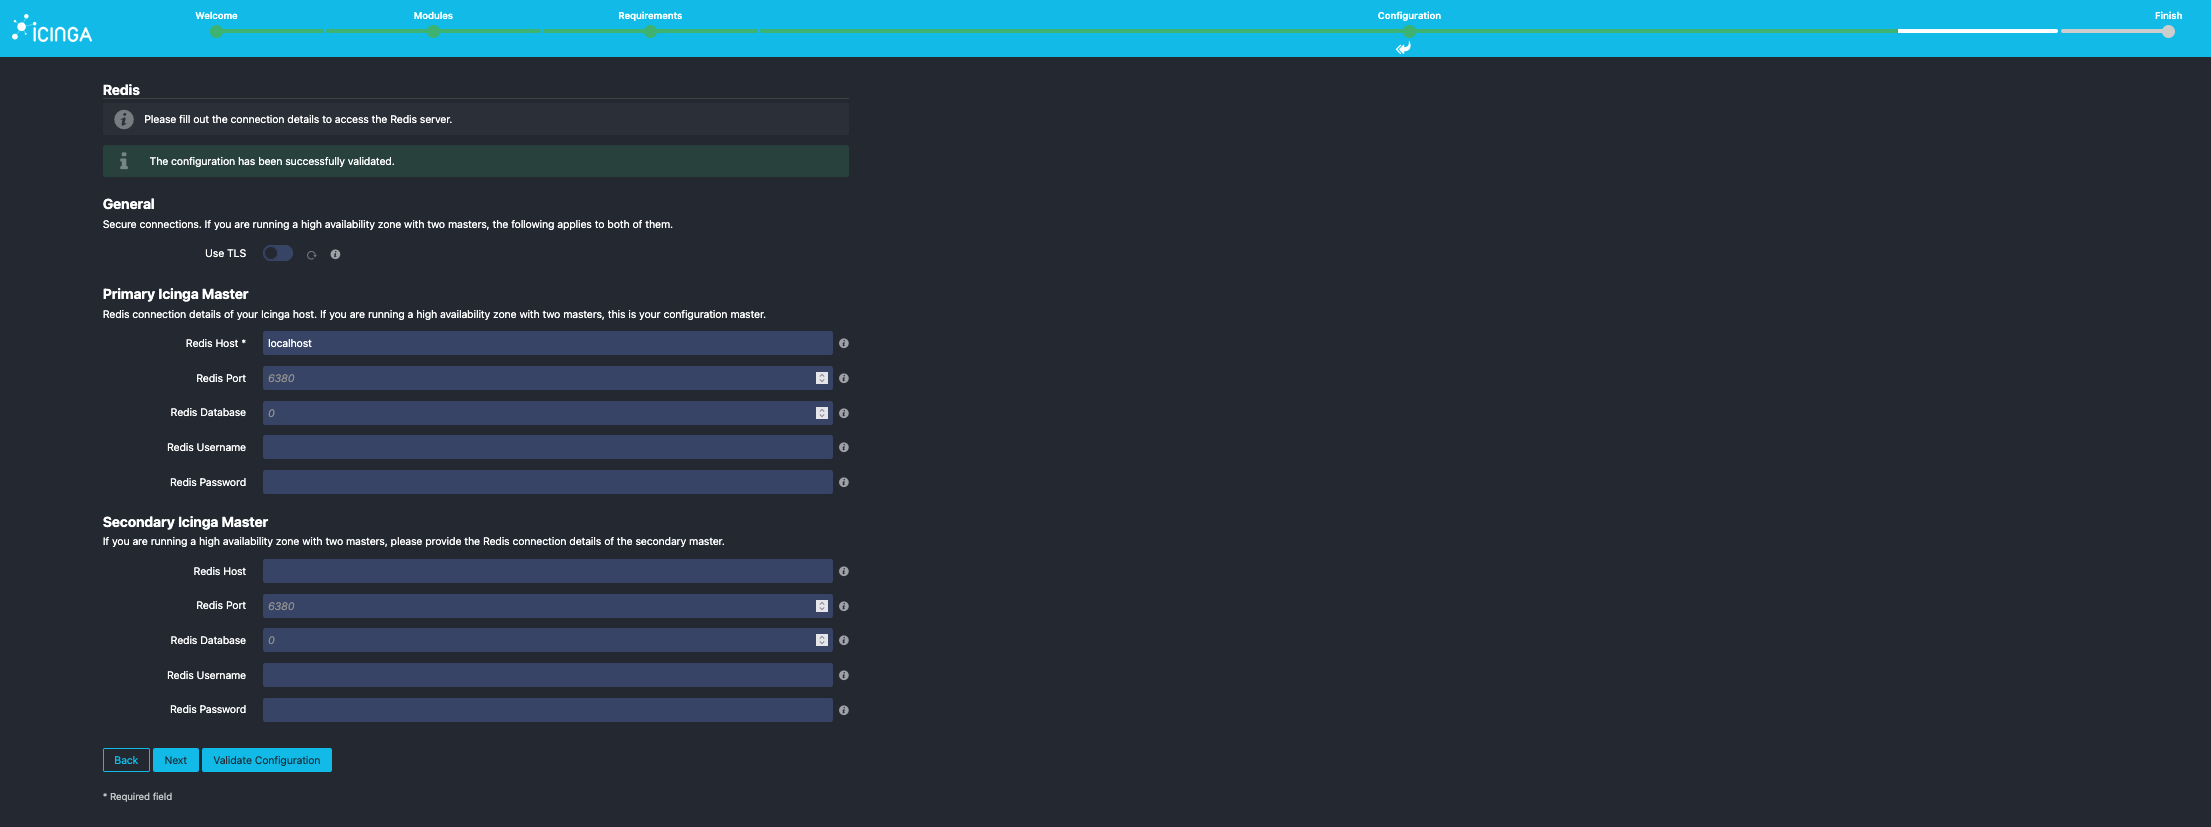
In the default setting not much is needed we focus on the Primary master and simply enter the redis host field.
Redis Host => localhost
In our example case this is localhost it might be something else in your environment.
Might be 192.168.172.1 depending on the machine where the redis is installed.
Then we click => next
Icinga2 APi Setup
Now the setup asks us for the api user we created before.
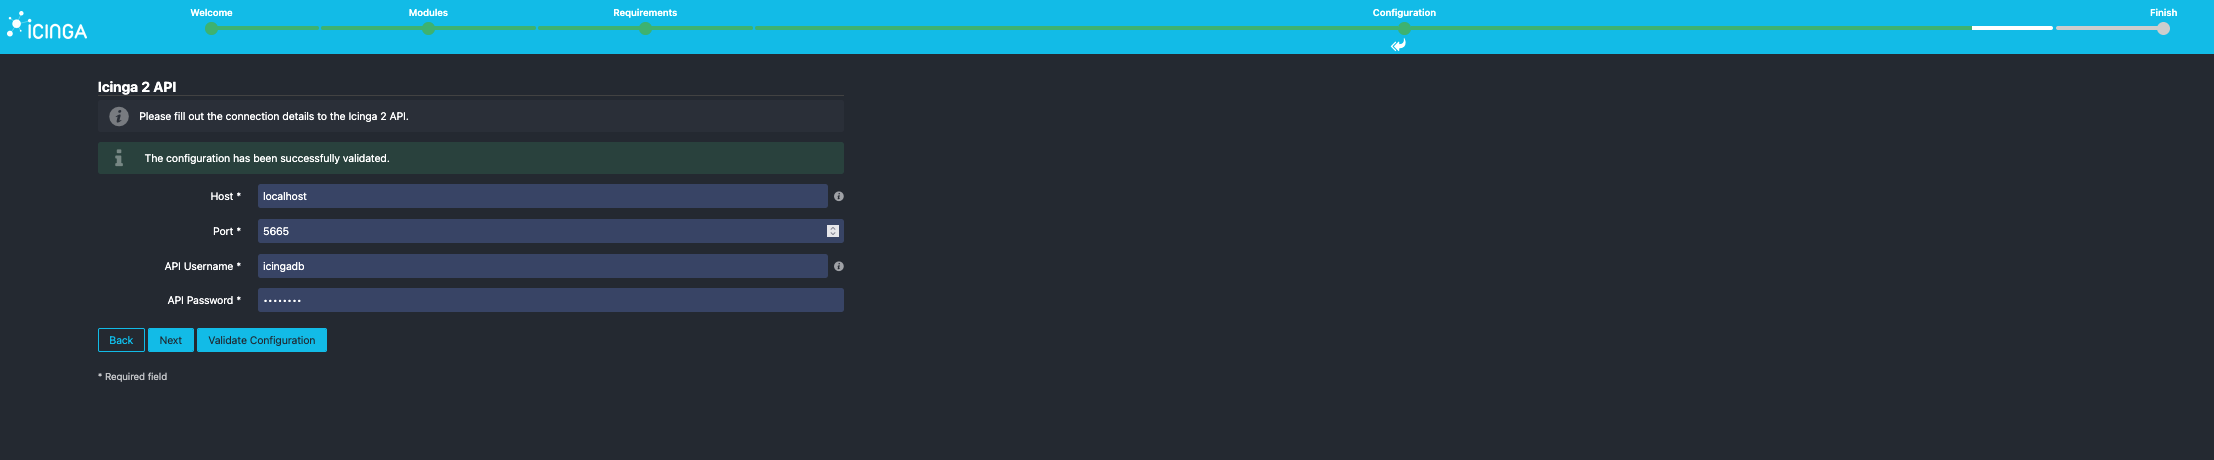
Host => localhost // like mentioned before this might be different in your environment
Port => 5665
Api Username => icingadb
Api Password => icingadb
We validate and then proceed with next.
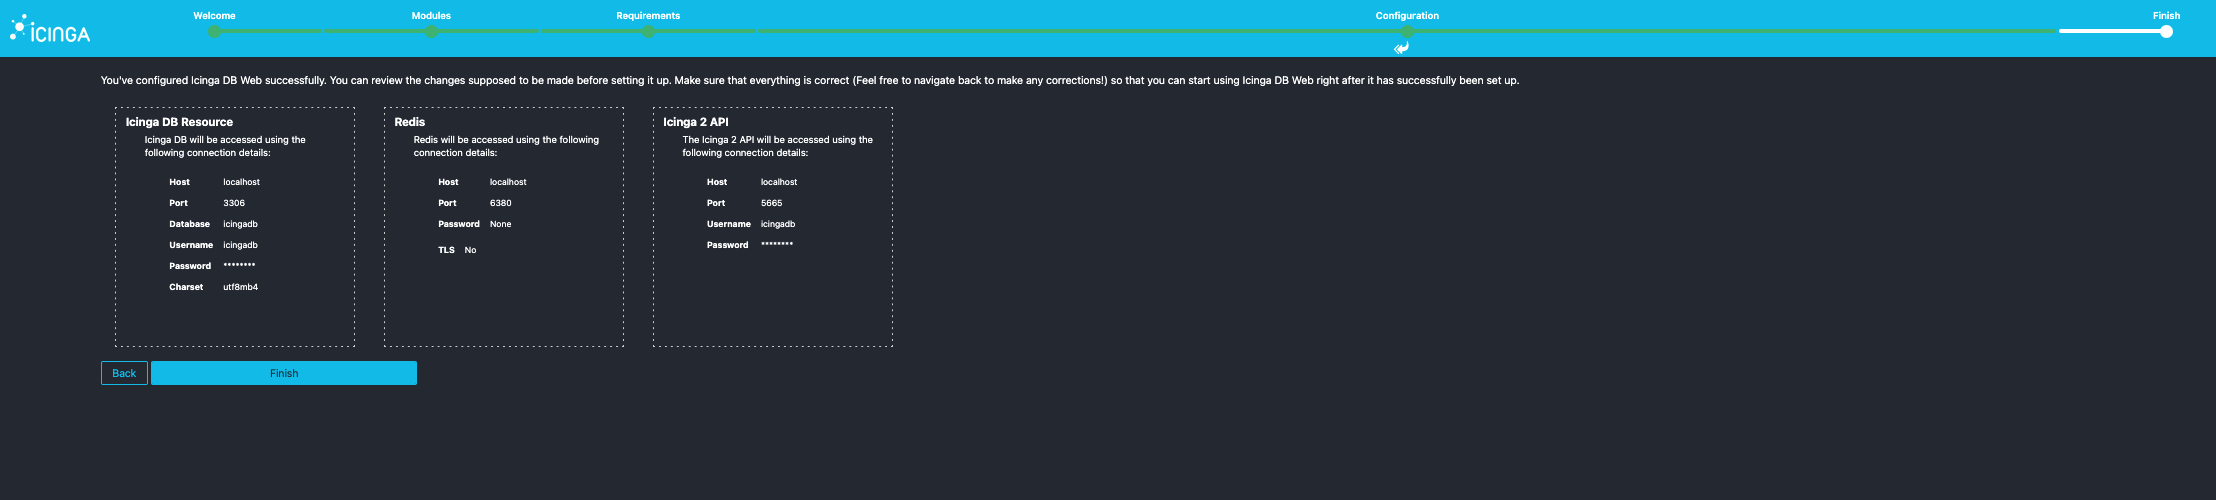
We enter a Summary Page and proceed with next

IcingaDB-Web Login Mask
We finished the installer and are now ready to log in

After we logged in with our credentials admin/supersecret
We are greeted with an empty icinga2.
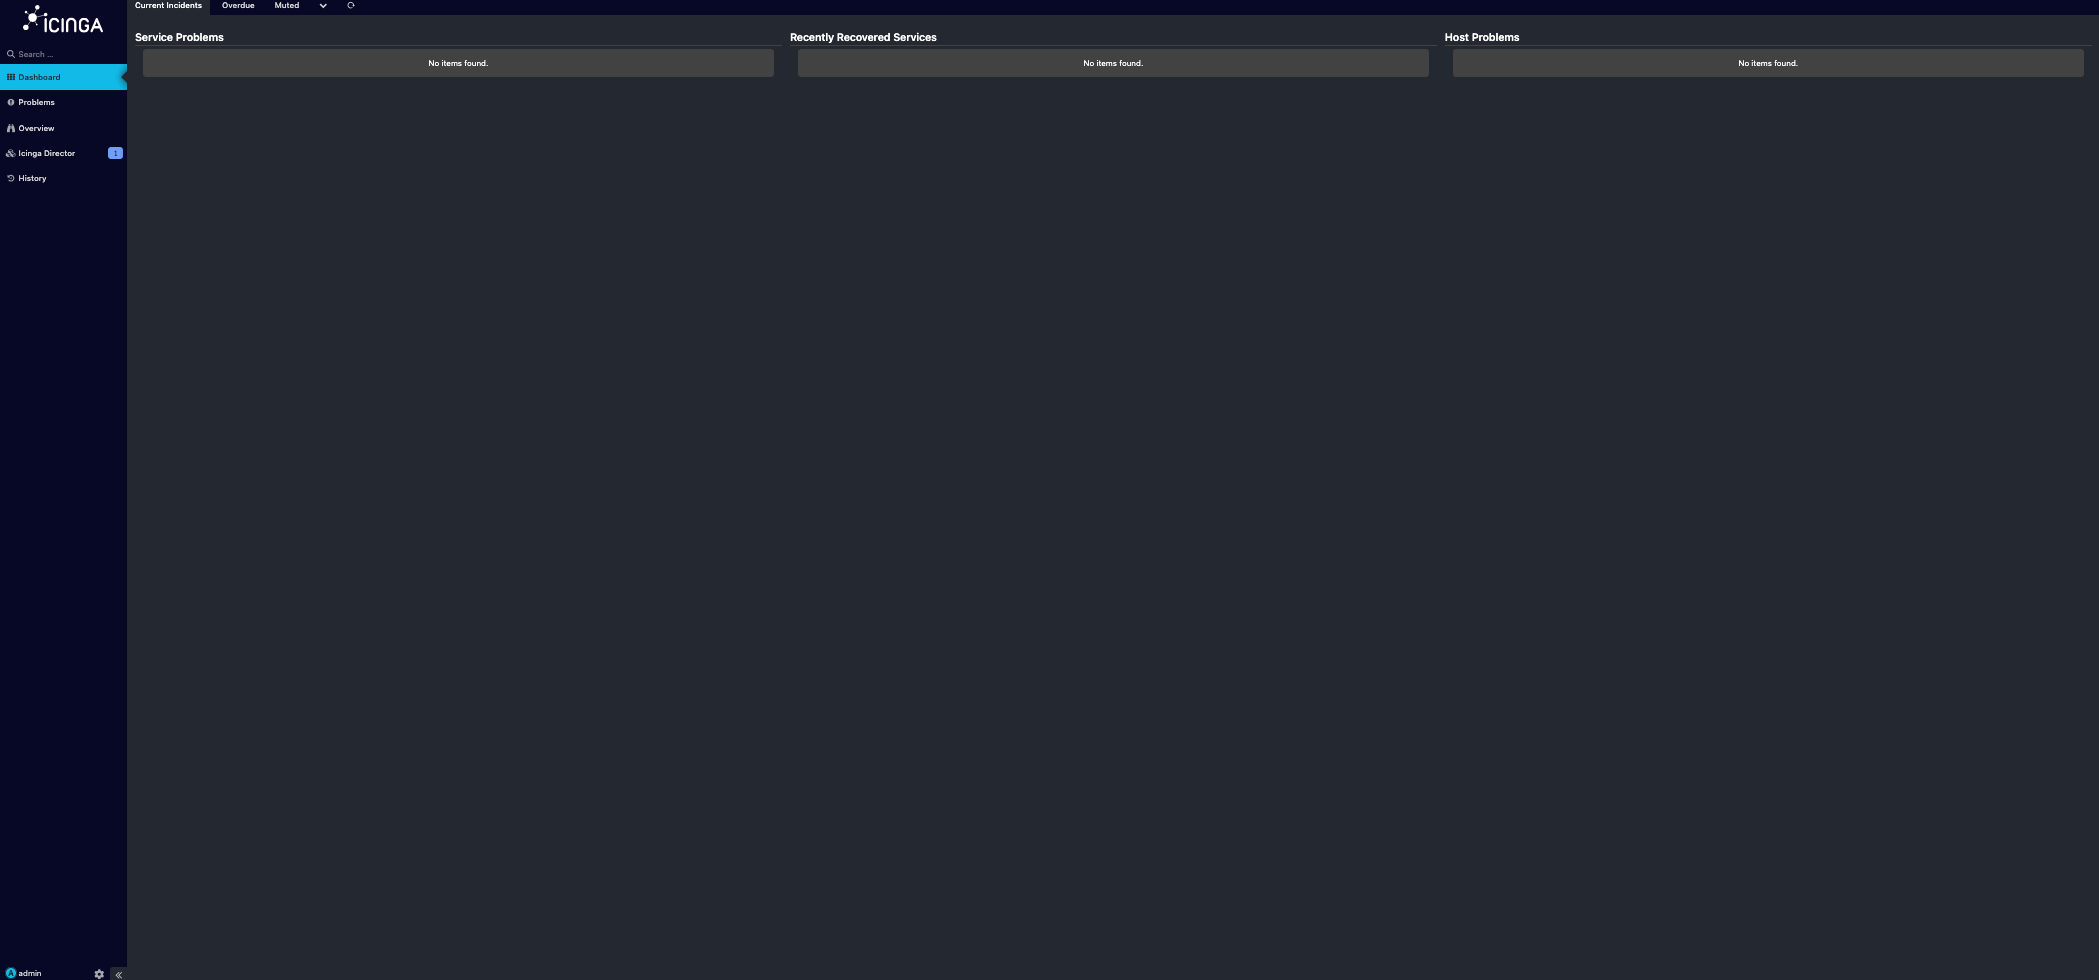
So we proceed to the setup of the icingaweb2 Director.
Icingaweb2 Director Setup
Inside the icingaweb2 interface we click the gear icon on the left down corner right beside our name.

Here we go to Application and then to the tab Resources.
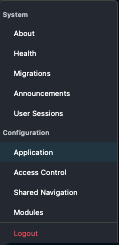
We click on create a new resource.
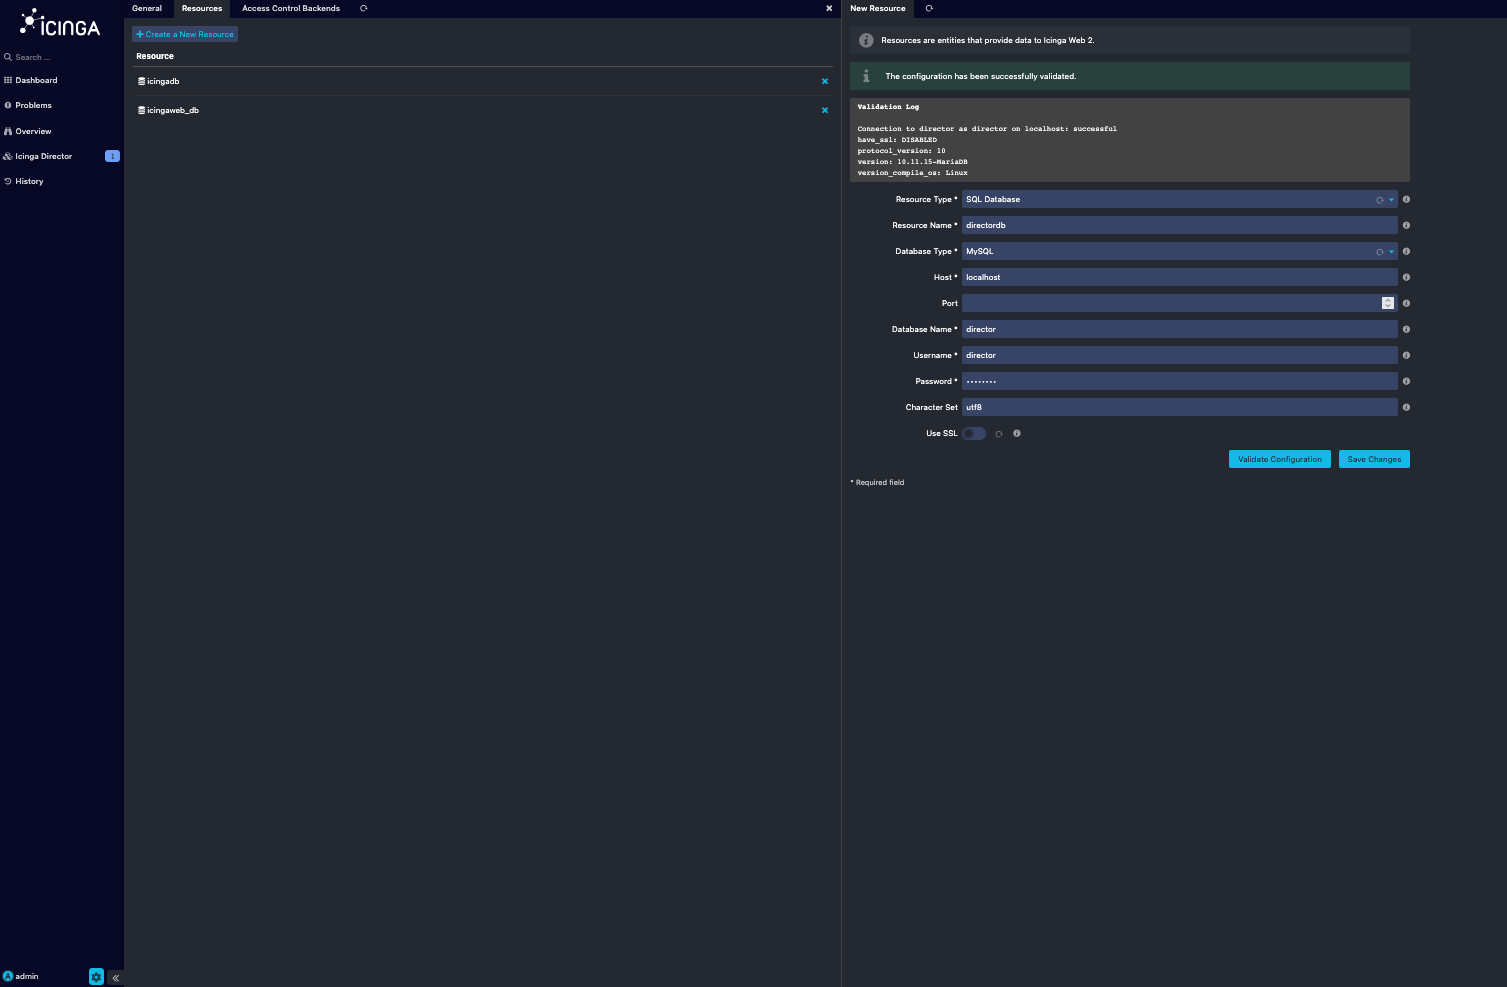
Resource Type => Mysql can also be Postgresql
Resource Name => Displayname of the new resource
Database Type => Mysql / Postgresql / Sqlite
Host => localhost
Port => 3306 defaults to the Database Ports ..
Database Name => director // the name of the previously created Database
Username => director // user the access was granted upon
Password => director // password set for the user
Character Set => utf8mb4 // Database encoding
We fill in the necessary fields and click then validate and save changes.
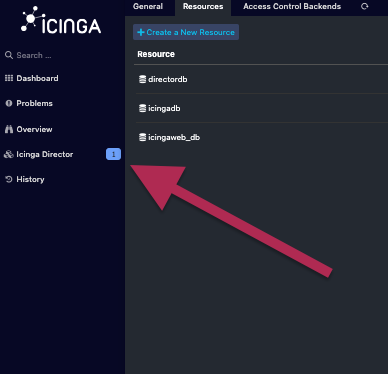
Then we click on the icinga director on the left side with the blue box.
We will be greeted with a dropdown box where we choose our database.
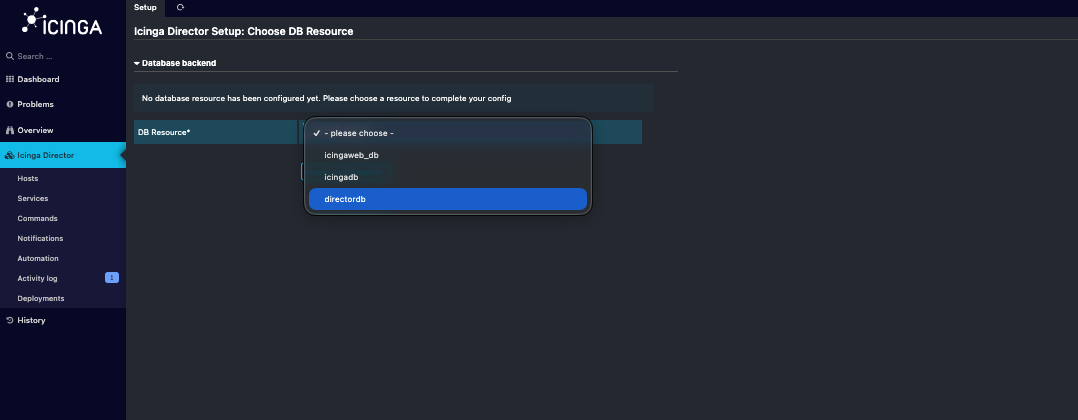
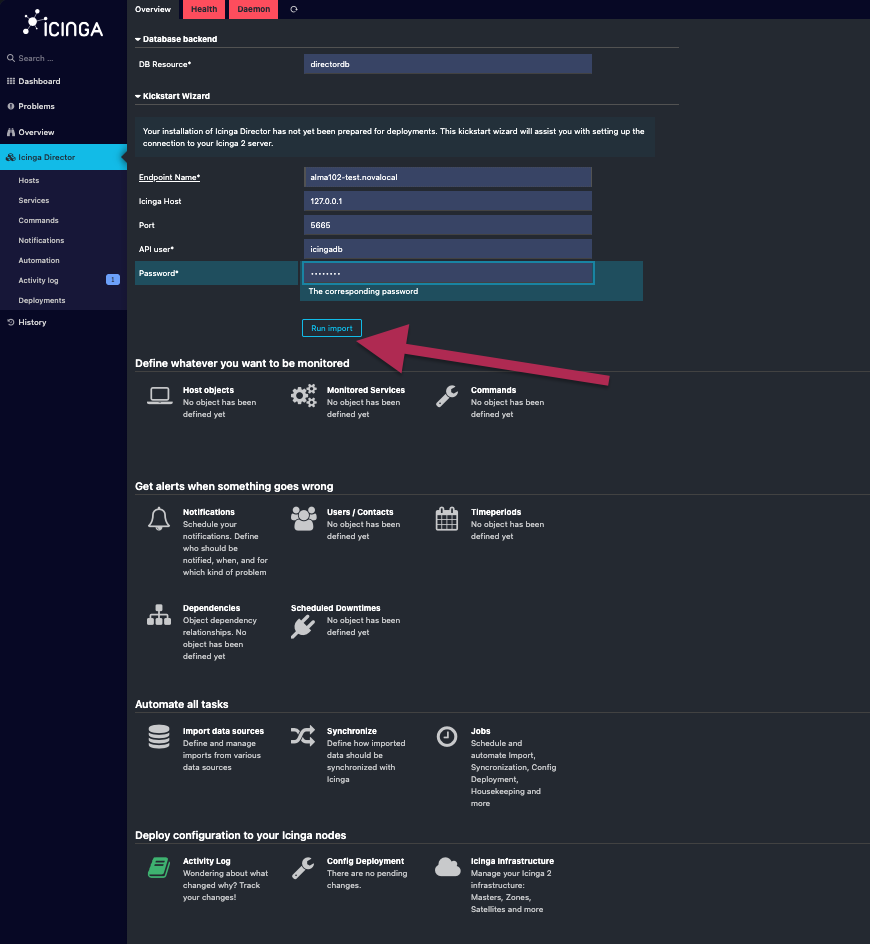
After that we will see the following Screen where we will enter some credentials needed for the Director to work.
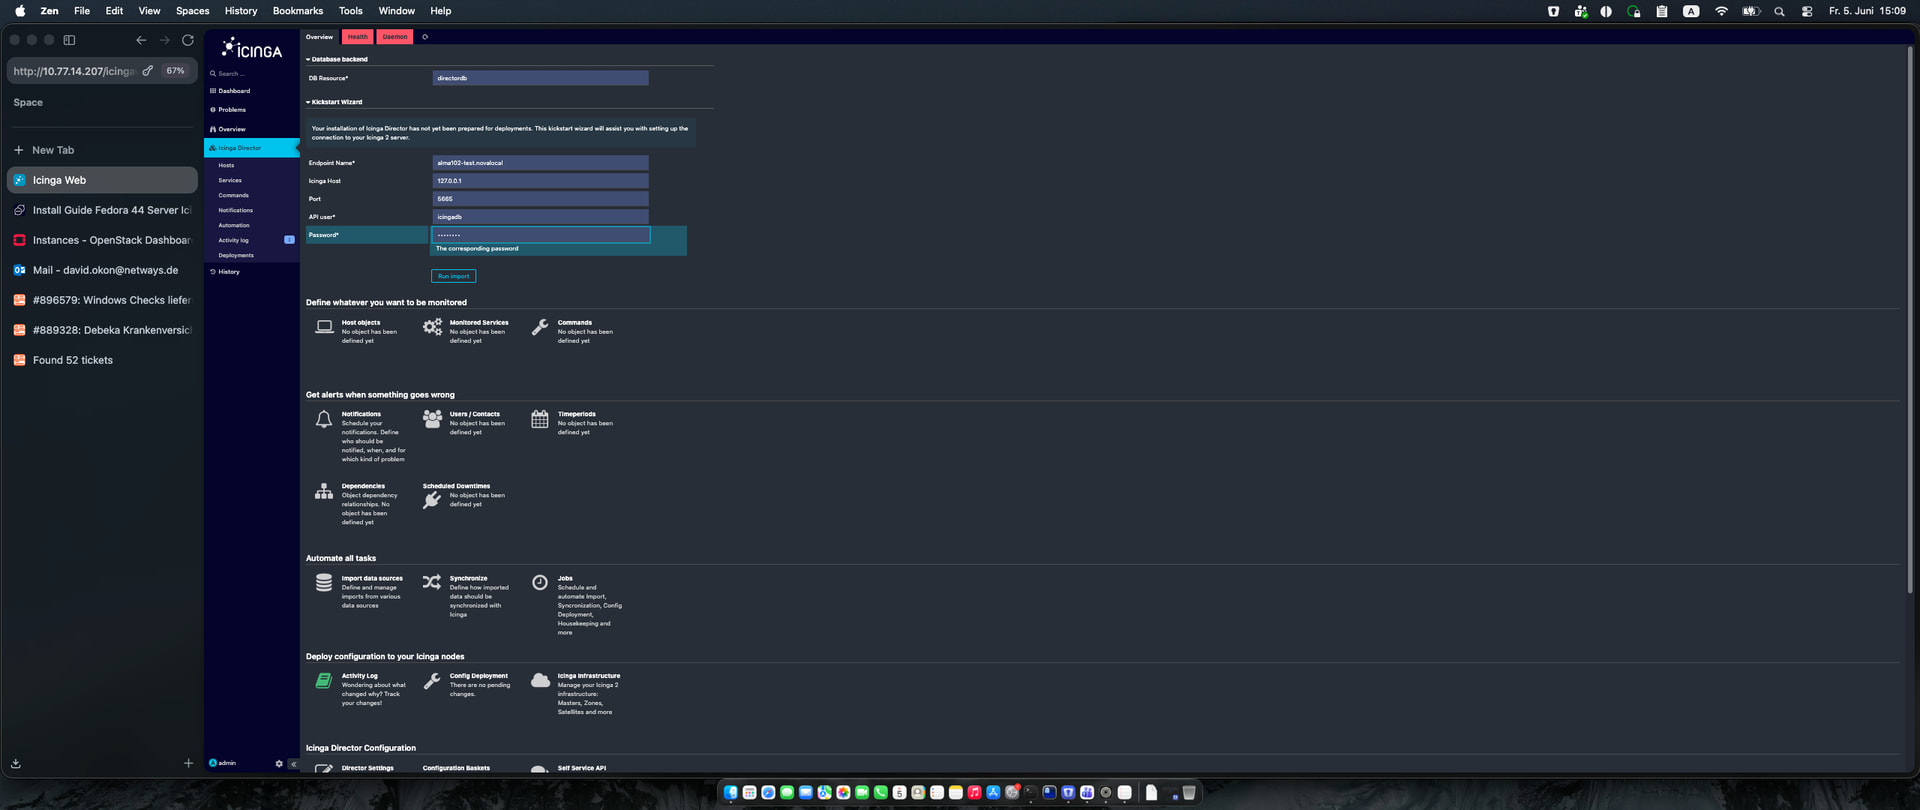
First is the
Endpoint Name => alma102-test.novalocal // this is the name of the machine sometimes the full hostfdqn
Icinga Host => 127.0.0.1 // IP Address of the instance this might differ in your setup
Api user => icingadb // usually you would create a new api user in the api-users.conf file
Password => icingadb // but we take the already created api user
After that we hit import
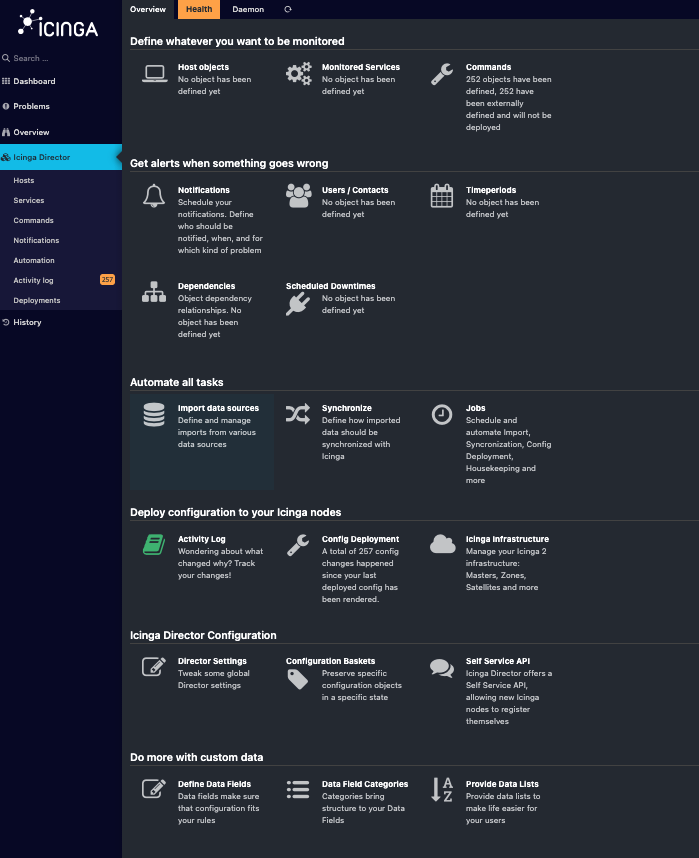
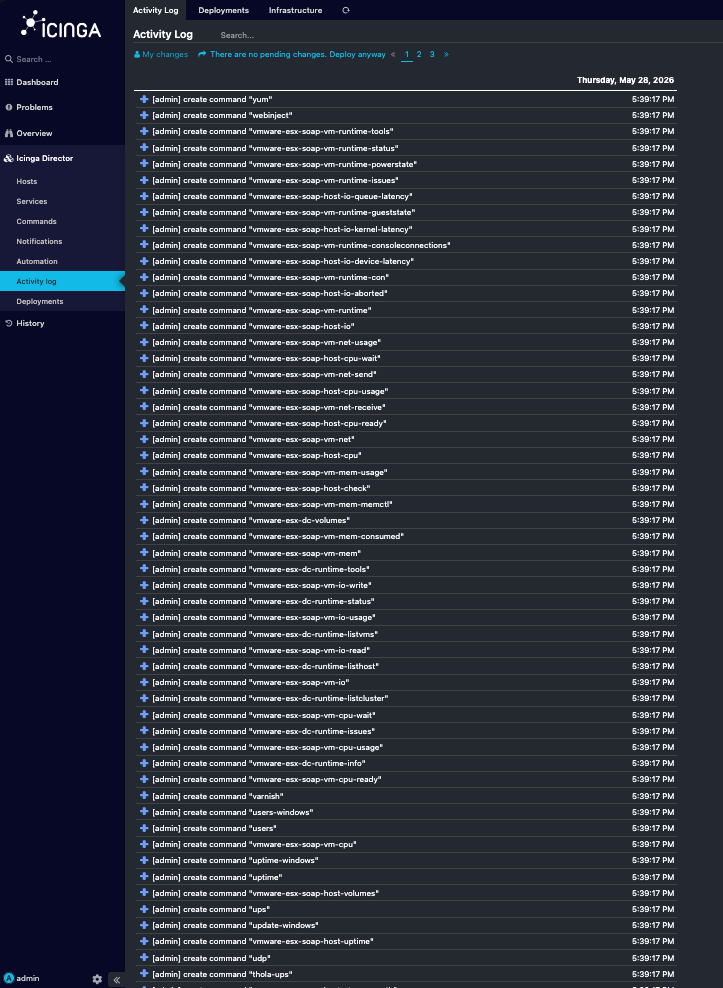
And we now should see an activity log filled with changes.
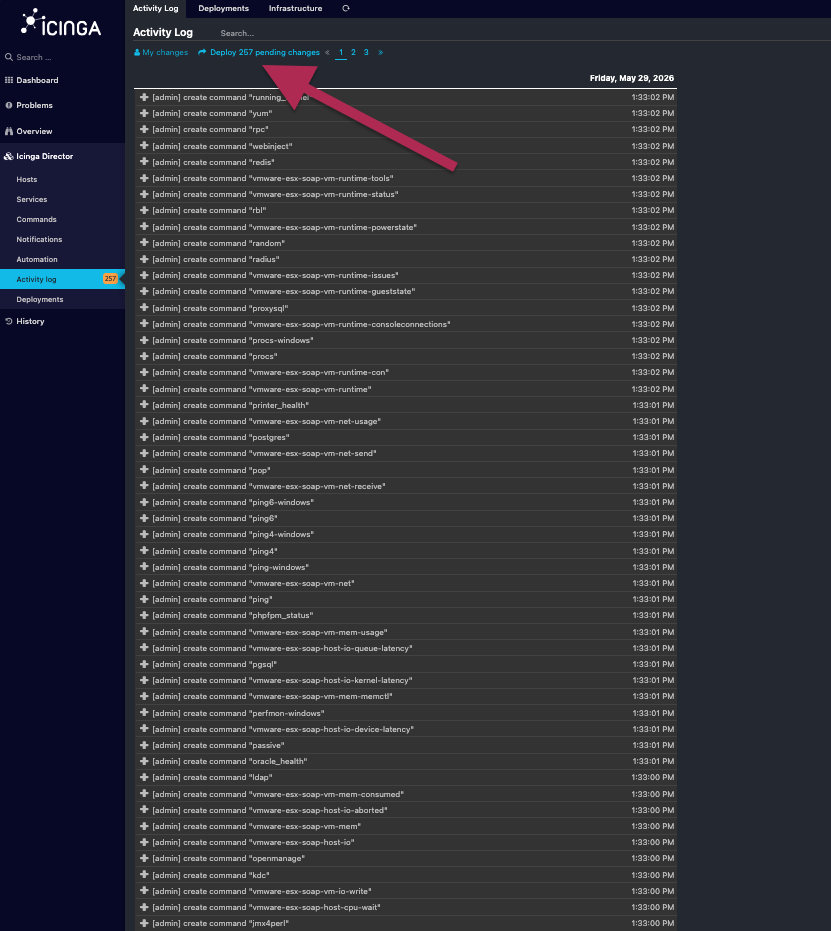
After hitting deploy changes it might look like this.
You might run into some issues with the icing-director.service it needs enabling and started to get the new settings.
systemctl enable icinga-director.service --now
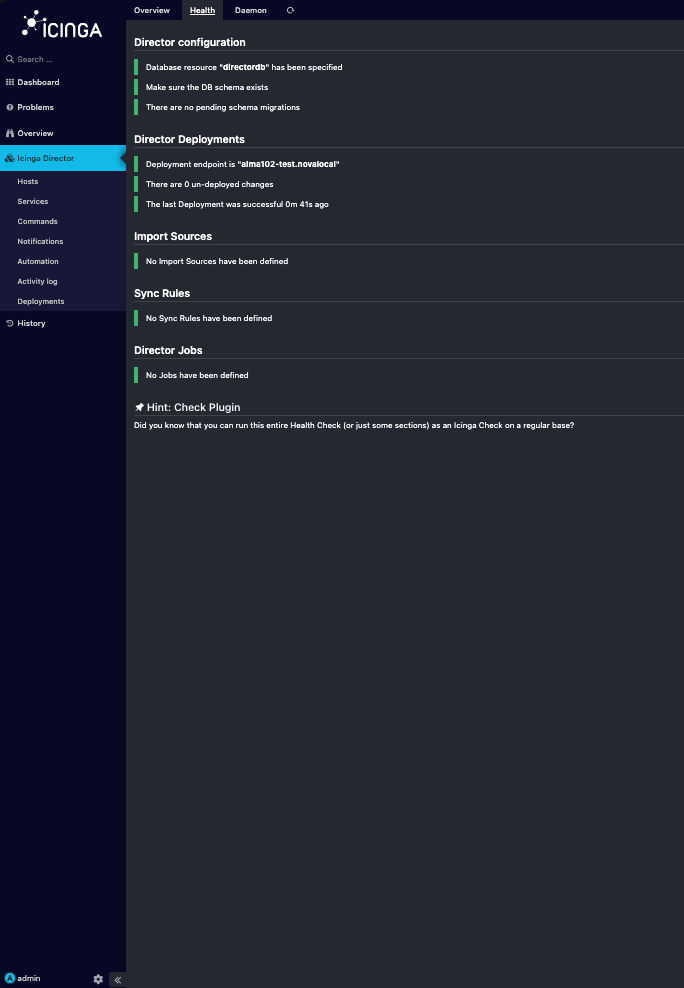
Final
Now you have an empty but test ready setup to start out testing icinga2 on an enterprise Linux.